If you have been sleeping under a donut… I mean rock, you will not have heard yet of the donut-shaped C code that can generate a 3D spinning donut, projected onto 2D using ASCII characters. And if spinning a donut with ASCII characters is not hard enough, and it clearly wasn’t for Andy Sloane, this code also simulates a light source so that when the donut spins you are able to see the lighting shine as the donut spins.
You heard it right!
A donut-shaped C code can generate a spinning donut. If you haven’t watched this donut in action yet, I highly recommend you. See the resources at the bottom of this page to check it out.
In this article, I am going to show you, how to create a 3D spinning donut but instead of using C code, we will be using Python and Blender. The maths that we are going to use is rather simple and I will try to explain it as we go along. This is going to be a fun project and a way to get acquainted with python and 3D modeling with Blender.
What you are waiting for? Let’s get started!
Drawing an Object with a single point
Before we even start talking about Math, let’s create an object in Blender with a single point at the origin, using the Python Blender API.
Open Blender, delete the default cube and click in the Scripting tab and paste the following code:
import bpy
new_mesh=bpy.data.meshes.new("new_mesh")
new_mesh.from_pydata([(0,0,0),[],[])
new_mesh.update()
## make objec from the mesh
new_object = bpy.data.objects.new("dot",new_mesh)
view_layer=bpy.context.view_layer
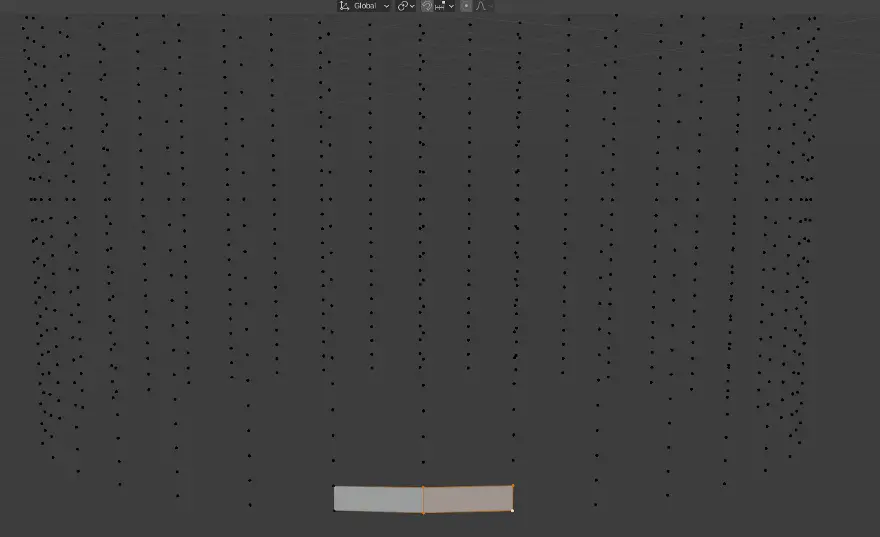
view_layer.active_layer_collection.collection.objects.link(new_object)After running the script, we can see that a new object with the name “dot” was created and that it only contains a single dot.
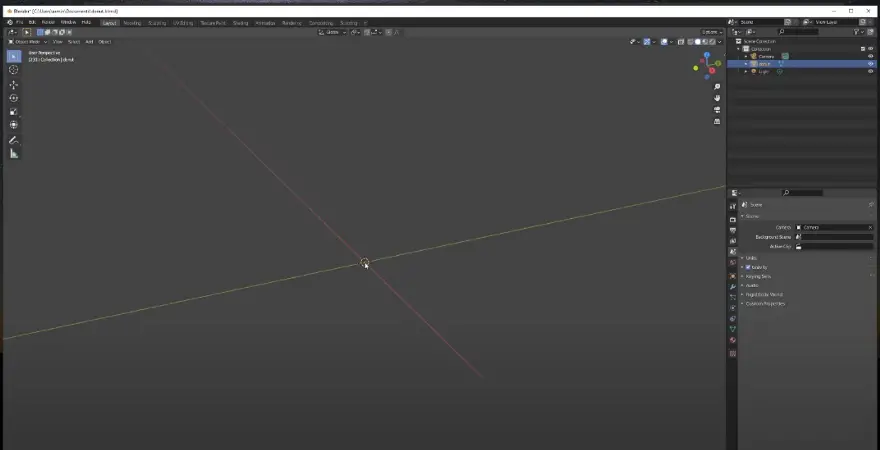
It might not look like a lot for now, but so was it not so for the Big Bang??
You will notice that the from_pydata() method is key. It accepts three parameters:
- a list of vertices
- a list of edges
- a list of faces
Since our object only contains a single point, we only used the first parameter(vertices).
If you don’t know what vertices, edges, faces, or meshes are check this article where I explain these: https://spltech.co.uk/how-to-create-a-3d-model-of-a-photo-using-python-numpy-and-google-colab-part-i/
Drawing a Circle
Now that we have managed to create a simple object in Blender using Python, we are ready to go to the next step. We are going to try and draw a circle, first in 2D.
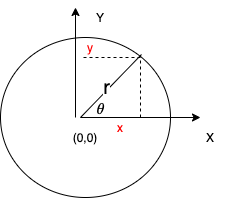
In order to draw a circle we need to use the parametric equations of a circle:
x =a + r cos teta
y =b +r sin teta
Where (x,y) are points within the circle P and (a,b) are the coordinates of the origin of the circle.
You might ask how we get these parametric equations? It comes from some simple high school trigonometry, the sine and cosine rules. I leave it for you as an exercise to acquaint you with these.
Using Python to calculate all the points of a Circle
Now that we understand how to calculate the X and Y coordinates of a circle, we are ready to convert the parametric equations of a circle into working Python code.
Let’s calculate all the points of a circle with origin (0,0) and radius 1:
import math
x = math.cos(0)
y = math.sin(0)
for angle in range(0, 360, 10):
   angle_radius = math.radians(angle)
   x = math.cos(angle_radius)
   y = math.sin(angle_radius)
   print(f"(x,y)=({x},{y})")
After running the code above, we get the following points:
(x,y)=(1.0,0.0) (x,y)=(0.984807753012208,0.17364817766693033)
(x,y)=(0.9396926207859084,0.3420201433256687)
(x,y)=(0.8660254037844387,0.49999999999999994)
(x,y)=(0.766044443118978,0.6427876096865393)
(x,y)= ...
Creating a Circle using Blender Python API
Now we are ready to try and create a circle in Blender:
import bpy
import math
circle_radius=10

vertices = []
for angle in range(0, 360, 10):
   print(angle)
   radians = math.radians(angle)
   x = circle_radius * math.cos(radians)
   y = circle_radius * math.sin(radians)
   vertices.append((x,y,z))

new_mesh=bpy.data.meshes.new("new_mesh")
new_mesh.from_pydata([vertices,[],[])
new_mesh.update()
## make objec from the mesh
new_object = bpy.data.objects.new("circle",new_mesh)
view_layer=bpy.context.view_layer
view_layer.active_layer_collection.collection.objects.link(new_object)
After executing the script we get the following “circle” object:
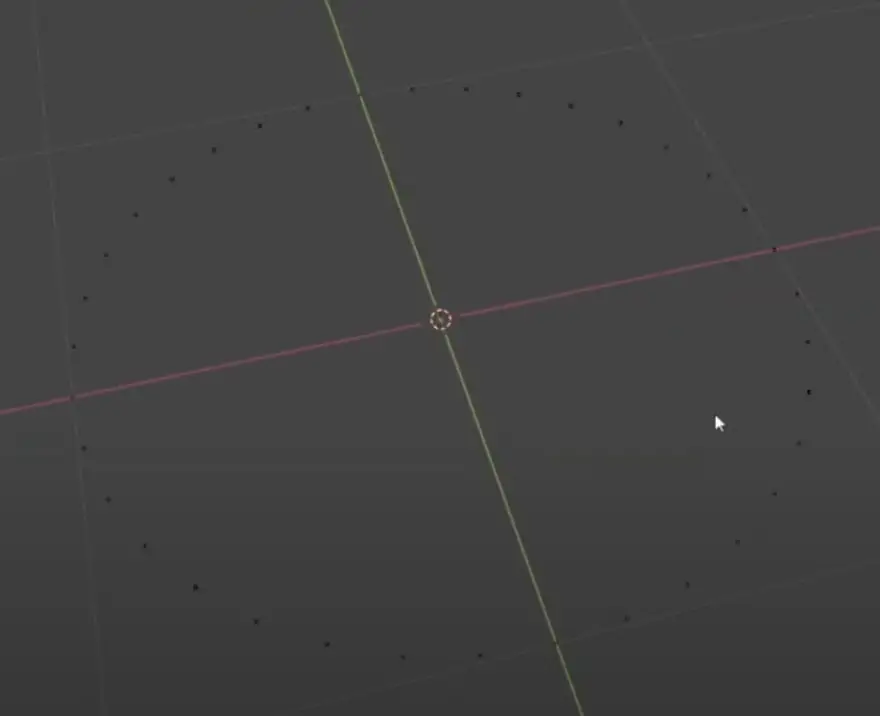
Notice that we have only defined the vertices, not the edges, nor any faces. This is because for now, we don’t need them.
Let’s pause for a second here. How are we going to be able to get our Torus, aka Donut?
To do that, we can rotate the circle along with one of the axis. However, the circle needs a gap between the rotation axis and the circle so that we get a Donut and not a sphere, as exemplified in the animation above.
So in conclusion, we want to move our circle from (0,0,0) to a separate location. You don’t need to strictly do that as you can also specify a rotation vector that doesn’t intersect the origin (0,0,0). But then why would we want to make our life a bit harder?
Here is the new code to draw the circle, which I have now converted into a function:
import bpy
import math
circle_radius=10

def circle(radius, coordinates):
    (a, b, z) = coordinates

vertices = []
    for angle in range(0, 360, 10):
      print(angle)
      radians = math.radians(angle)
      x = a + circle_radius * math.cos(radians)
      y = b + circle_radius * math.sin(radians)
      vertices.append((x,y,z))

    return vertices
Creating a Cylinder — Generating the vertices
You might think that at this stage we should just rotate the circle to get our donut. But first, I want to take a small detour. Before we try to get our Torus, let’s try to create a Cylinder. A cylinder is just an unfolded Torus, so if we can do a cylinder we are halfway there anyway.
And this time we are not only defining the vertices, we are also going to create the faces.
To define a cylinder we will just create a stack of circles and connect all the vertices together to get one solid cylinder.
Let’s define the vertices for our cylinders:
# draw a cylinder
height = 20
cilinder_vertices = []
per_circle_vertices = 0
for z in np.arange(0.0, height, 0.1):
    vertices = circle(circle_radius, (0,0, z))
    cilinder_vertices += vertices
    per_circle_vertices = len(vertices)


new_mesh=bpy.data.meshes.new("new_mesh")
new_mesh.from_pydata(cilinder_vertices,[],[])
new_mesh.update()
## make objec from the mesh
new_object = bpy.data.objects.new("cilinder",new_mesh)
view_layer=bpy.context.view_layer
view_layer.active_layer_collection.collection.objects.link(new_object)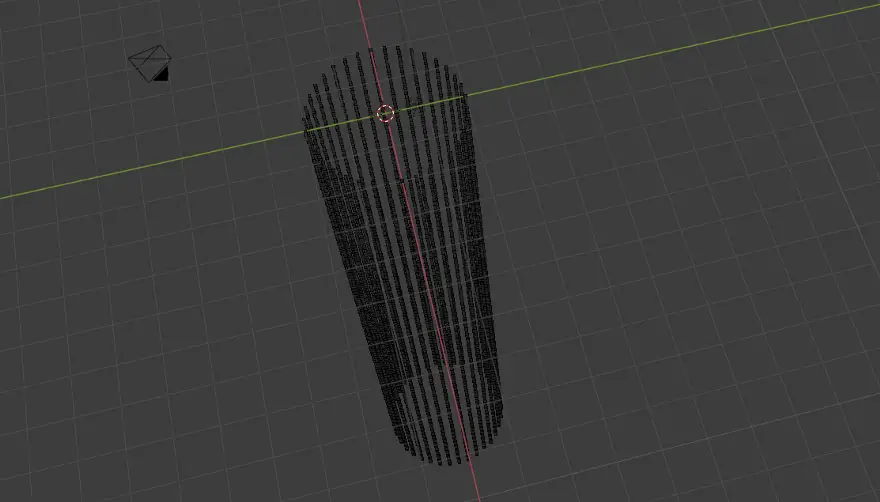
Creating a Cylinder — Defining the Faces
Now it is time to define the faces. This is going to be a bit tricky.
The reason I say it is tricky is that in order to define each face, we need to identify each vertice of the face using the index of the array of vertices we created earlier. The number of vertices can be huge. For this cylinder, we have 7400 vertices, which might seem like a lot, but some objects in Blender can have hundreds of thousands of vertices. So there is no way that we are just going to count one by one. We need to have some kind of formula.
We are in luck because we are able to control exactly the order in which each vertice is created.
Here is our game plan:
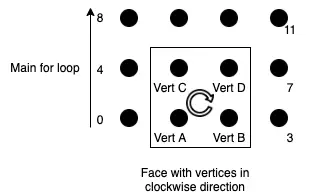
Each face is going to be a square, and we will start creating faces from vertex 0 and so on. We know how many vertices each row in the cylinder has, so we can easily calculate the positions of the adjacent vertices. We will create a loop and we will be careful to stop just before we hit the last row of vertices in the cylinder. Each face we create will contain vertices in the clockwise direction (Vert A, Vert C, Vert D, and Vert B)
Here is how the code to create the faces looks like:
cilinder_rows = int(height / 0.1)
faces=[]
for row in range(0, cilinder_rows-1):
    for index in range (0, per_circle_vertices-1):
         verticeA = index + (row * per_circle_vertices)
         verticeB = verticeA + 1
         verticeC = verticeA + per_circle_vertices
         verticeD = verticeB + per_circle_vertices

         face = (verticeA, verticeC, verticeD, verticeB)


         faces.append(face)
Now that we have a list of faces for the cylinder our blender code looks like this:
new_mesh=bpy.data.meshes.new("new_mesh")
new_mesh.from_pydata(cylinder_vertices,[],faces)
new_mesh.update()
## make objec from the mesh
new_object = bpy.data.objects.new("cylinder",new_mesh)
view_layer=bpy.context.view_layer
view_layer.active_layer_collection.collection.objects.link(new_object)
And in Blender, after running the script we get:
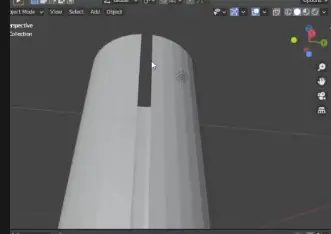
You probably have spotted something missing. Each row in the cylinder seems to be missing a face. This is because we have not connected the last vertex of the circle to the first vertex. We need to create additional faces to cover the last and first vertex of each row.
The solution I went with was to add a small “cheat” code to the circle function, by adding an extra vertex to the circle which coincides with the first vertex of the circle.
So here is how the code to create the circle now looks:
def circle(radius, coordinates):
    (a, b, z) = coordinates

vertices = []
    for angle in range(0, 360, 10):
      print(angle)
      radians = math.radians(angle)
      x = a + circle_radius * math.cos(radians)
      y = b + circle_radius * math.sin(radians)
      vertices.append((x,y,z))
       # for convenience we are duplicating the first vertice and make it also the last vertice
    vertices.append(vertices[0])
    print(len(vertices))

    return vertices
Ok… we are duplicating points. But Blender seems to be ok with that.
The advantage of this cheat is that we keep our code clean and easy to understand.
After re-running the Blender script we finally get a proper cylinder:
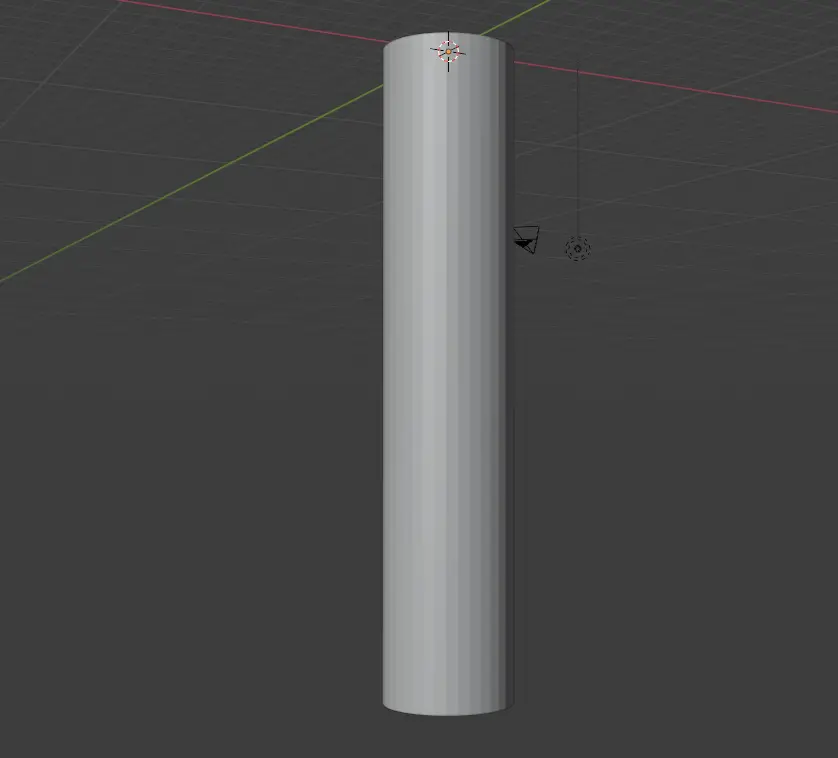
I didn’t close the top and bottom of the cylinder on purpose. We are not stopping here. Now we are ready to try and create a Donut by folding the cylinder.
Rotating a vertice using Euler-Rodrigues Formula
In order to create our donut, we need to rotate a circle around an axis, in the 3D space. Each delta rotation around the axis is going to give us the 3D points of each vertex in the Torus.
We will be relying on the Euler-Rodrigues formula to create a rotation matrix which then will be applied as a dot product to each vertice that needs to be rotated.
Thanks to stackoverflow, I found a nice ready-to-use function to do this:
import numpy as np
import math

def rotation_matrix(axis, theta):
    """
    Return the rotation matrix associated with counterclockwise rotation about
    the given axis by theta radians.
    """
    axis = np.asarray(axis)
    axis = axis / math.sqrt(np.dot(axis, axis))
    a = math.cos(theta / 2.0)
    b, c, d = -axis * math.sin(theta / 2.0)
    aa, bb, cc, dd = a * a, b * b, c * c, d * d
    bc, ad, ac, ab, bd, cd = b * c, a * d, a * c, a * b, b * d, c * d
    return np.array([[aa + bb - cc - dd, 2 * (bc + ad), 2 * (bd - ac)],
                     [2 * (bc - ad), aa + cc - bb - dd, 2 * (cd + ab)],
                     [2 * (bd + ac), 2 * (cd - ab), aa + dd - bb - cc]])
Below is an example of how this function will work if applied to a vertex:
v = [3, 5, 0]
axis = [4, 4, 1]
theta = 1.2

print(np.dot(rotation_matrix(axis, theta), v))
# [ 2.74911638 4.77180932 1.91629719]Let’s define a function called rotate which given a list of vertices, an angle, in degrees, and an axis, it converts the angle to radians and uses the rotation_matrix function to rotate the list of vertices by the given angle along the given axis. Note that the rotation is done in the clockwise direction.
import math

def rotate(vertices, angle_degrees, axis=(0,1,0)):
    theta_degrees = angle_degrees
    theta_radians = math.radians(theta_degrees)
    rotated_vertices = list(map(lambda v: np.dot(rotation_matrix(axis, theta_radians), v), vertices))

    return rotated_vertices
Now we can rotate any list of vertices easily:
test_circle_vertices = circle(10, (0,0,0))
rotated_circle = rotate(test_circle_vertices, 90, axis=(0,1,0))
Creating the donut
We are ready to calculate all the vertices of our donut. We will create a donut by rotating a circle of radius 5 with origin at (X=5,Y=0,Z=0) around the axis(vector) (0,1,0), in increments of 10 degrees for each rotation:
delta_angle = 10
for angle in range(0, 360, delta_angle):
circle_vertices = circle(5, (5,0,0))
rotated_circle = rotate(circle_vertices, angle)
per_circle_vertices = len(circle_vertices)
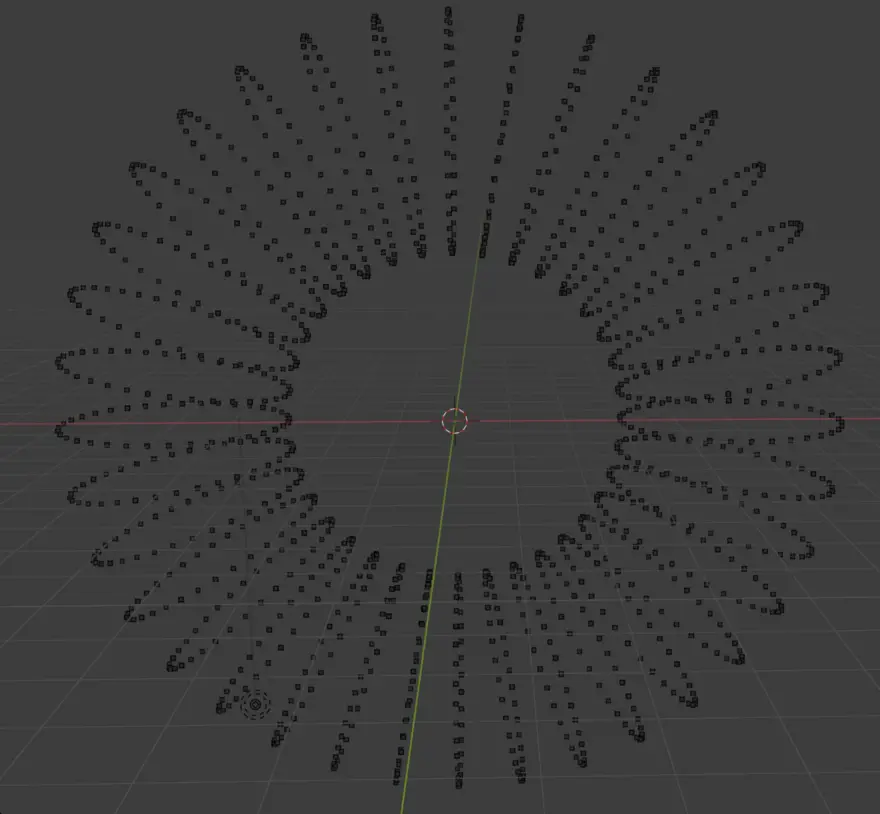
donut_vertices += rotated_circleAnd after we execute this code in Blender, we get:
Adding the faces of the Donut
Now we are just missing the faces of the donut, to make it a solid object. Remember the code that we wrote to create the faces of the cylinder? We can just re-use that code:
faces=[]
for row in range(0, donut_number_rows-1):
    for index in range (0, per_circle_vertices-1):
         verticeA = index + (row * per_circle_vertices)
         verticeB = verticeA + 1
         verticeC = verticeA + per_circle_vertices
         verticeD = verticeB + per_circle_vertices

         face = (verticeA, verticeC, verticeD, verticeB)
         faces.append(face)
After we run this in Blender, we get:
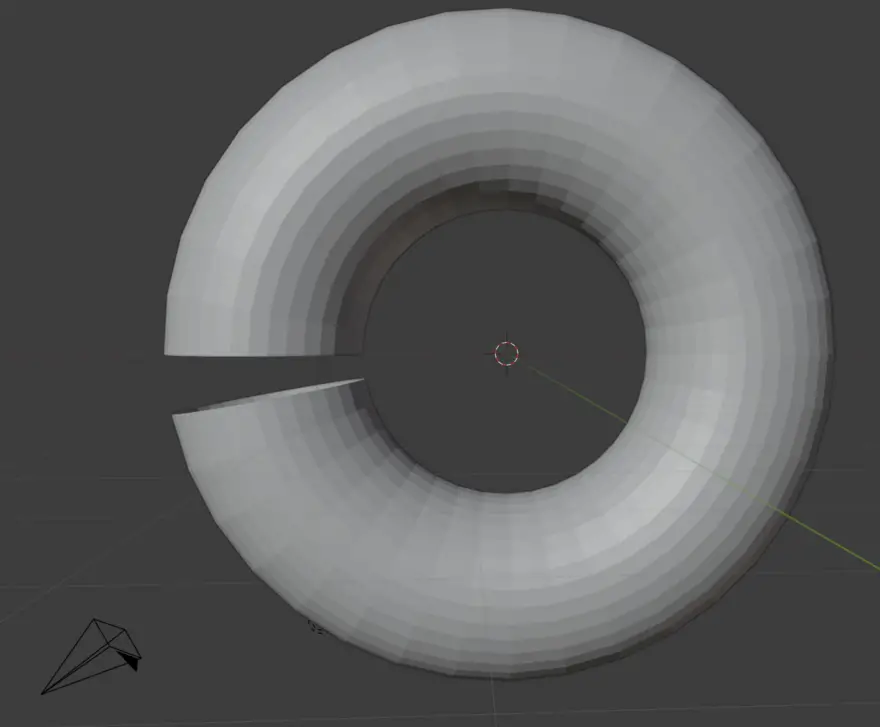
Oh, it looks like someone took a bite of our donut. The problem here, is very similar to the problem we faced with the cylinder. We have to unite the last vertices of the donut(angle=350) to the starting vertices(angle=0) of the donut to create the last faces. Time for a similar cheat that we used in the circle:
delta_angle = 10

for angle in range(0, 370, delta_angle):
    circle_vertices = circle(5, (5,0,0))
    rotated_circle = rotate(circle_vertices, angle)
    per_circle_vertices = len(circle_vertices)
    donut_vertices += rotated_circle
So we create an extra set of vertices, which ensures that we get one wholesome donut:
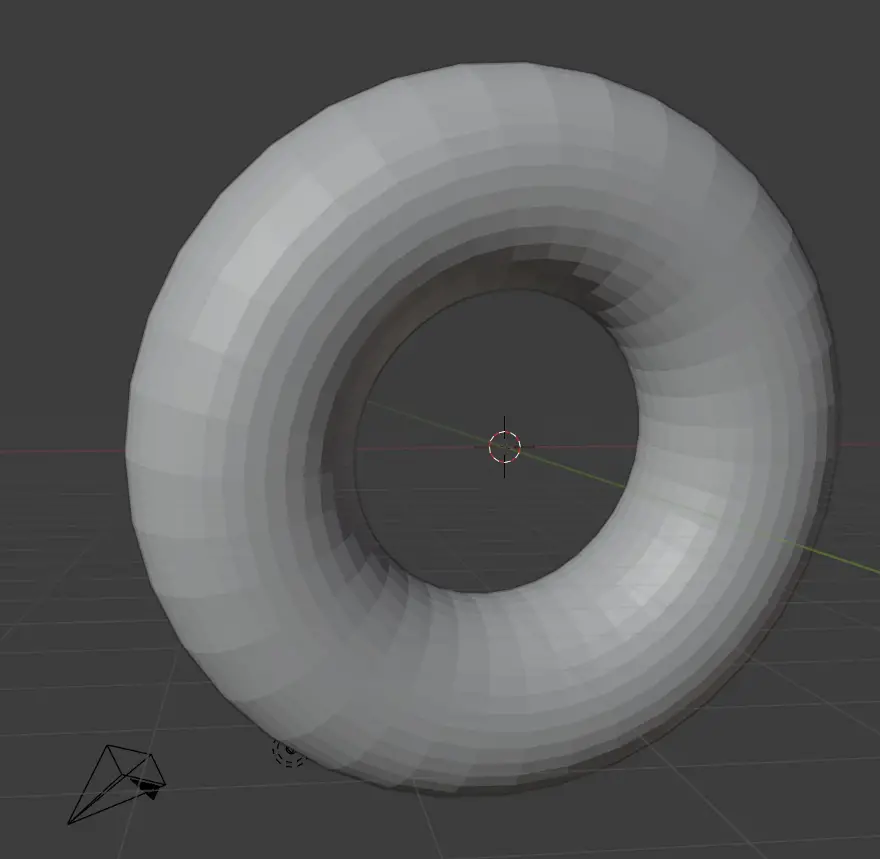
We can make this donut a lot smoother by using more vertices. I leave that for you as an exercise.
Spinning the Donut with Blender
Now the most important part comes. How do we make the donut spin using Blender?
It turns out I can’t just use the function rotate that we defined earlier. The reason is Blender, needs to track the rotation, for the animation to work. So in this case we are going to just rely on Blender’s rotate function. Note that I didn’t use it earlier, as that would not be very educational.
To make the animation work in Blender, I need to define keyframes at key points in the animation and let Blender do the rest. For that we are going to use Blender’s keyframe_insert method:
keyframe_insert(data_path, index=- 1, frame=bpy.context.scene.frame_current, group='', options=set())Insert a keyframe on the property given, adding fcurves and animation data when necessary.
data_path is the name of the Object’s attribute that the animation will track. For instance if you change the Object’s location attribute for a given key frame then you need to set data_path=”location” or, if you rotate the object using the rotation_euler attribute of the object, then data_path=”rotation_euler”
frame is the frame number of the keyframe you are creating.
Below is the Blender Python code for spinning the Donut:
donut = bpy.data.objects["donut"]

for angle in range(0, 360, 10):
    donut.rotation_euler = (math.radians(angle),math.radians(angle),math.radians(angle))
    donut.keyframe_insert(data_path="rotation_euler", frame=angle)
And Voila! We have created a spinning Donut that does a 360 degree rotation across the X, Y and Z axis for a total of 360 frames.
So we have done rotation after rotation after rotation…
That is all for now. Hope you enjoyed this tutorial. The complete source code is available as Github gist for you to run in Blender.
Also you might want to watch the video version of this tutorial:
Hope to see you again soon! Happy Coding!
Resources
Recommended Courses for Data Science
- Learn Python for Beginners 👉🏼 Python for Everybody
- Learn Deep Learning with Andrew Ng 👉🏼 Neural Networks and Deep Learning by Andrew Ng
- Learn Data Science with Coursera Plus 👉🏼 Coursera Plus For Data Science
Source Code
https://gist.github.com/armindocachada/d78dc9914c0dc98ea51873a44f17150c
https://stackoverflow.com/questions/6802577/rotation-of-3d-vector
https://www.a1k0n.net/2011/07/20/donut-math.html
https://docs.blender.org/api/current/bpy.types.bpy_struct.html#bpy.types.bpy_struct.keyframe_insert