I recently recorded a four-part video series for my Youtube channel on how I attempted to create a 3D model out of a photo, using Python, Numpy, and Google Colab.
For this programming, I relied on the Numpy STL library which can create 3D models using “simple” Numpy arrays.
Why I did it
I am a 3D Printing enthusiast so I set myself a challenge to use this library to create a 3D model of a photo that, when printed in translucent white is called a Lithophane. There are a few tools available to do this without any coding. But where is the fun in that?
I want to inspire You
Just to be clear, I didn’t create this series to show you an amazing solution for creating 3D models or to impress you with my rusty math skills, or even my rudimentary geometry or even my rudimentary Python Numpy programming skills. They are all lacking, I know. But that is really the point.
I created this series to inspire anyone who wants to do software development, that anything is possible if you just give it a go. I also wanted to how software development is really done. No embellishments and no repeats! You don’t need to know everything from the start either.
How I plan to create a 3D model of a Photo
The way I plan to create a 3D model of a photo is very simple. I will load an image and convert it from colour to grayscale. Then I will resize the image to the size of the 3D model I want to create.
Then I will use the pixel intensity of the resized grayscale image to determine the thickness of each point in the 3D model, thereby creating a 3D model of a photo. Simple right?
Tools that you will need
- Brain(any size will do)
- Computer with browser
- Blender for visualising the 3D model(Or any software that can visualise STL files)
- My YouTube series
The first video of my series is available at the top of the page.
The entire solution is available at https://github.com/armindocachada/create-3d-model-using-python.
But I recommend that you start from scratch. I will assume you want to do the latter.
When you are ready to start, head to Google Colab. Create an empty notebook and get ready.
Install Blender
First thing you should do if you don’t have any way to display STL files is to download Blender and install it on your computer.
Blender is a very popular, and completely free, 3D Modelling software that is also used to create amazing 2D/3D animations and among many other things, game development. Blender also has a built-in Python interpreter which gives you access to Blender’s 3D modelling functions. But, we will not be using any of those functions. Not today at least.
Install Numpy-STL
Google Colab already has Numpy installed. All you need to add is Numpy STL.
!pip3 install numpy-stl
Trying the Numpy Quickstart Example
The first step is to try the simplest example in the Numpy STL documentation. By trying an example code, I have a starting point, of something that already works, and that will be what I will use as a way to understand the basics of the Numpy STL library and as an anchor point.
import numpy as np
from stl import mesh

# Define the 8 vertices of the cube
vertices = np.array([\
    [-1, -1, -1],
    [+1, -1, -1],
    [+1, +1, -1],
    [-1, +1, -1],
    [-1, -1, +1],
    [+1, -1, +1],
    [+1, +1, +1],
    [-1, +1, +1]])
# Define the 12 triangles composing the cube
faces = np.array([\
    [0,3,1],
    [1,3,2],
    [0,4,7],
    [0,7,3],
    [4,5,6],
    [4,6,7],
    [5,1,2],
    [5,2,6],
    [2,3,6],
    [3,7,6],
    [0,1,5],
    [0,5,4]])

# Create the mesh
cube = mesh.Mesh(np.zeros(faces.shape[0], dtype=mesh.Mesh.dtype))
for i, f in enumerate(faces):
    for j in range(3):
        print(vertices[f[j],:])
        cube.vectors[i][j] = vertices[f[j]]

# Write the mesh to file "cube.stl"
cube.save('cube.stl')
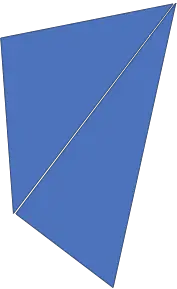
When running the code snippet in Google Colab, we get an STL file called cube.stl with the following 3D object
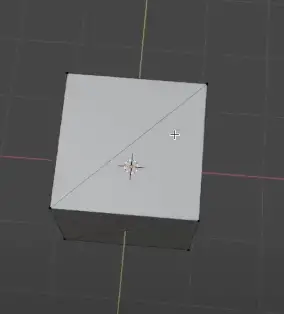
This is a cube with 12 faces. Each face is a triangle.
To understand what the code does, it helps if we look up the definitions in Geometry for each concept.
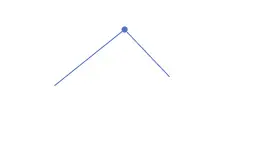
Vertex/vertices
A vertex is a corner, or more precisely, a point where two lines intersect.
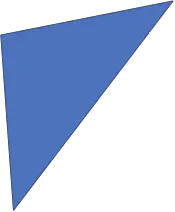
Face
A face is an individual flat surface, part of a solid object. Our example cube has 12 individual faces. And each face is a triangle. However, don’t think that a triangle is the only type of face you can use. You could have a quadrilateral face or even a face with more than 4 edges.
I don’t know about you, but for me, it is already complicated enough with 3 edges. So I will stick with triangles.
Edge
The code above doesn’t explicitly mention edges, however, I think it is important to mention it for completeness. An edge is a line that connects two vertices. Simple right?

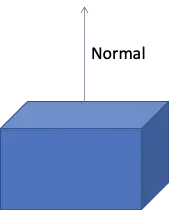
Vertex Normal
A Vertex Normal is a vector that points in the direction that a face points to.
Mesh
Now let’s just define what a mesh is.
A mesh is a collection of vertices, edges and faces that describe the shape of a 3D object. As explained earlier faces can have different shapes, but during our exercise, we will only use triangular faces.
Now that we have taken the definitions out of the way, the code snippet makes much more sense.
We first list the different vertices of the cube as a Numpy array of [X, Y, Z] coordinates.
vertices = np.array([\
[-1, -1, -1],
[+1, -1, -1],
[+1, +1, -1],
[-1, +1, -1],
[-1, -1, +1],
[+1, -1, +1],
[+1, +1, +1],
[-1, +1, +1]])
Then we create another Numpy array with the faces using the index of each vertice defined earlier.
faces = np.array([\
[0,3,1],
[1,3,2],
[0,4,7],
[0,7,3],
[4,5,6],
[4,6,7],
[5,1,2],
[5,2,6],
[2,3,6],
[3,7,6],
[0,1,5],
[0,5,4]])
This Numpy array is actually just an intermediate data structure that is then used to create the Mesh.
# Create the mesh
cube = mesh.Mesh(np.zeros(faces.shape[0], dtype=mesh.Mesh.dtype))
for i, f in enumerate(faces):
for j in range(3):
print(vertices[f[j],:])
cube.vectors[i][j] = vertices[f[j]]
Each element in the Mesh.vectors list contains three vertices, which, when connected, define a face.
Undertstanding stl.Mesh.dtype
When I first encountered stl.Mesh.dtype, when studying the documentation of Numpy STL I clearly stumbled on this definition. And here is why:
dtype = dtype([('normals', '<f4', (3,)), ('vectors', '<f4', (3, 3)), ('attr', '<u2', (1,))])
Unless you are an experienced Python/Numpy expert, you will probably spit your coffee when looking a the definition above. When I first saw this, I did what most software developers normally, do. Tried to understand, ignored and proceeded.
But now that I am writing this article, I think I am ready to decipher this.
What is Dtype?
To answer this question I am going to quote directly from the Numpy documentation:
A data type object (an instance of
numpy.dtypeclass) describes how the bytes in the fixed-size block of memory corresponding to an array item should be interpreted. It describes the following aspects of the data:1. Type of the data (integer, float, Python object, etc.)
2. Size of the data (how many bytes is in e.g. the integer)
3. Byte order of the data (little-endian or big-endian)
4. If the data type is structured data type, an aggregate of other data types, (e.g., describing an array item consisting of an integer and a float),
– what are the names of the “fields” of the structure, by which they can be accessed,
– what is the data-type of each field, and
– which part of the memory block each field takes.
– If the data type is a sub-array, what is its shape and data type.
In the type definition for Mesh dtype, we the normals being defined as:
('normals', '<f4', (3,))
‘normals’ is the name of the field, not much to say
‘<f4’ tells me three things:
- it’s a floating-point number
- it’s a 32-bit floating-point number(f4)
- It’s in Little Endian representation(‘<’)
Little-Endian what? I had to blow away the dust from my computer-science book to remind me of this one. It has to do with the way we store numbers, in memory. In Little-endian, the least significant byte is stored first, i.e. in the lower memory address. Big Endian is the exact opposite.
Still don’t understand? I recommend you to watch a quick youtube video to better understand. There are plenty.
The last piece of the puzzle is (3,) this indicates that normals have a subarray of 3 fields. Each field has type ‘<f4’
Simple right?
You can see that the remainder of the dtype definition in pretty much the same way. For instance ‘<u2’ is an unsigned 16 bits int in little-endian format. (1,) means it only has one field.
('attr', '<u2', (1,))
Did I get anything wrong? Please let me know.
Finally, we have reached the end of Part I. It was pretty packed in terms of knowledge to absorb. So take your time, read, watch my Youtube series and in no time you will be able to read Part II of my article.
Happy Coding!
RESOURCES
Source Code
https://github.com/armindocachada/create-3d-model-using-python
Numpy STL Library
https://pypi.org/project/numpy-stl/
Wikipedia Article – What is a Mesh?
https://en.wikibooks.org/wiki/Blender_3D:_Noob_to_Pro/What_is_a_Mesh%3F
Numpy Array Dtypes In Detail
https://numpy.org/doc/stable/reference/arrays.dtypes.html