Flutter: the cross-platform tool to build native iOS and Android apps
I have recently started to learn Flutter, I am still at the very beginning exploring it. This article is my learning notes to show you how to build a simple ListView from scratch.
Step 1: Install the SDK on macOS
Not surprising that the first step is to download the SDK, followed by adding it to your path in $HOME/.bash_profile with the following line:
export PATH=[YOUR_PATH]/flutter/bin:$PATH
Run . ./.bash_profile to refresh.
Step 2: Setup the platform

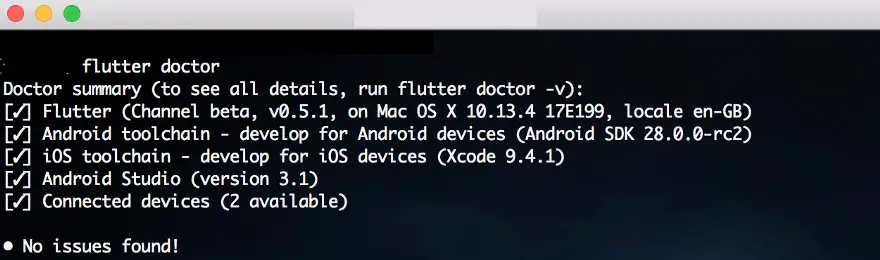
It is much easier to setup Flutter just on Android Studio (as an Android dev), but wouldn’t it be nice to build an iOS app from Android studio? To do so we need to check the missing parts, by running following command on terminal:
$ flutter doctor
This command gives you an analysis of your building environment, ideally, after few installations/updating /struggling we should receive full ticks, but I did spend a good hour to get it working. This requires a full set up of Android Studio and Xcode.
Step 3: Configure Android studio
Assuming Android studio is your IDE (IntelliJ is another alternatives), update it to version 3.0+, then add Dart and Flutter plugins (Preferences>Plugins> Browse repositories>Dart). Repeat the same step for Flutter, restart your Android studio, and you should see Flutter as a project type.
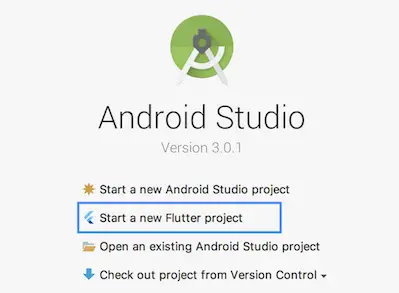
If you don’t see Flutter is added, something might be wrong with your plugin settings, you can re-configure it or create a new Flutter project from the command line:
$ flutter create sampleapp
Now open this project in Android Studio to build your “Hello world” Flutter app, good luck!
*** Important notes*** for those who needs to write platform specific languages into the Android and iOS folder. The above setting enables you to use Java for Android and ObjectiveC for iOS by default, but to build your project using Kotlin or Swift, the iOS project will compile but not run, and the Android project won’t even compile, you’d receive NoClassDefFoundError. It took me a few good hours to debug and solve this issue, taking into account at the point of writing this posts, the help / support you can find online for Flutter is minimum for inch case scenario. The correct command to use that enables Kotlin and Android is:
$ flutter create --org your.package.name -i swift -a kotlin --description 'My Flutter App' my_app
If unfortunately you end up like me, starting the app with default settings but want to enable Kotlin / Swift later on, you can always create another project, transfer the Android / iOS folder to existing project, or the existing lib folder with pubspe.yaml file to new one.
Step 4: Stateless vs Stateful Widget
If you look at the code in SampleApp, you might notice two Widgets: Stateless and Stateful. It took me some time to fully understand the concept with an Android background. Those two widgets are used to build UI component, where a Stateless widget is used to create views with hardcoded / static content, i.e. a TextView in Splash screen with “Welcome to the app” message. Whereas Stateful widget is dynamic such as an ImageView where resources are loaded at runtime.
Step 5: Let’s code
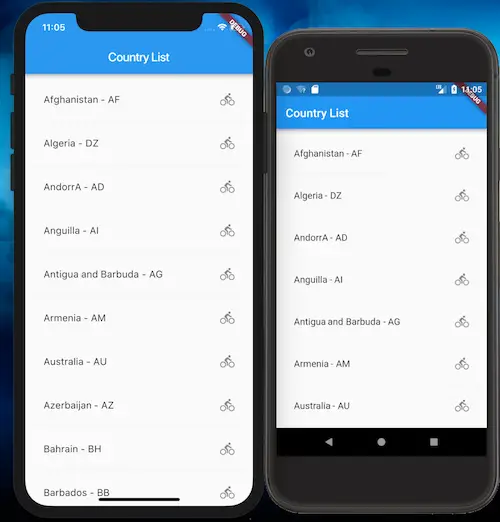
Let’s try to make a ListView with country names read from local json. Download the JSON file and save it: sampleapp/data_repo/country.json. Then go to sampleapp/pubspec.yaml and modify this file by adding:
flutter:
... ... ...
assets:      - data_repo/country.json
Now go main.dart, change it to:
import 'package:flutter/material.dart';
import 'package:sample/CountryState.dart';
void main() => runApp(MyApp());
class MyApp extends StatelessWidget {
  @override
  Widget build(BuildContext context) {
    return MaterialApp(
      title: 'Startup',
      home: CountryApp(),
    );
  }
}
This class is similar to the MainActivity for Android or AppDelegate for iOS, of course, you would see errors here, because we haven’t created CountryState.dart yet, let’s add this file:
This is all you need to read and parse the JSON to create a ListView with icon and styling. The way Dart works is by nesting UI component as parent/child, similar to Android layout.xml. It is arguable that the downside is we cannot preview UI layout while editing it, but did I mention that Flutter supports hot-load? which means by saving your code, or just simply click the yellow thunder icon, you will see your changes instantly.

Now select your device and build it, happy coding! A more complex example of GridView can be found here (with Json parser, animations, Audio play and Share).
You can find full code here.