TensorFlow is a wonderful tool for machine learning, where its main purpose is designed for neural network models. When it comes to mobile, Google has provided us with two libraries: TensorFlow mobile and TensorFlow Lite.
They both works on Android and iOS. While TensorFlow mobile is recommended to use for developers who have a pre-trained model (a trained model is like the brain, which teaches the system how to recognise objects), TensorFlow Lite isthe lightweight solution that comes with a pre-tested model with 1000 predefined classes. (to read more on TensorFlow)
In this tutorial, we will use TensorFlow Lite as an example.
Step 1: Set up the project
I am going to jump the steps of creating new project on Android studio and assuming you have a project that runs. So here is what we need in module level gradle:
buildscript {
    repositories {
        maven { url 'https://google.bintray.com/tensorflow'}
    }
}android {
    aaptOptions {
        noCompress "tflite"
        noCompress "lite"
    }}dependencies {
    implementation 'org.tensorflow:tensorflow-android:+'
}
Step 2: Add models and label file
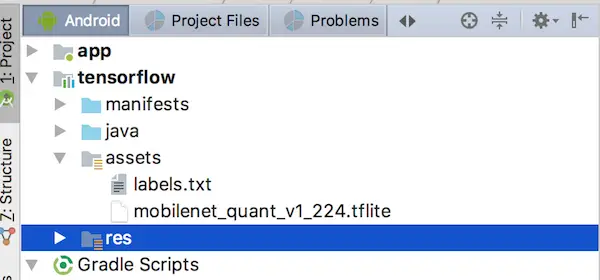
Add label.txt and .tflite files in: myproject/app/src/main/assets (github link to download the file)
Step 3: Layout file
This is a simple layout, which has a TextView to display results and an ImageView to display a picture for your model to read:https://teresa-wu.medium.com/media/59d36173e4adcdd1f69e2eda1e81fa32
Step 4: Kotlin classes and functions
Create classes to hold data and to print out formatted results:https://teresa-wu.medium.com/media/e86107a442bd0dfc9a85e323747ed2cb
Now we need a classifier class to recognise the image, usually this could be as simple as to create an Interpreter object and fire interpreter.run( ), but because we are dealing with images, you also need to parse the image and resize it. The following code is taking from Google TensorFlow Android sample project, where I have simplied and converted to Kotlin:https://teresa-wu.medium.com/media/ab26d6e324dec3e958c341bd79451bbf
Last step is to create the view class, so we can run and play the app:
Note: Bitmap.createScaleBitmap is a very important step, without it you might get “ArrayOutOfIndexException”. This is because the sample image has to be same size as the model image, and I will explain the reason behind it in another post, where I talk more about how to train your own model.https://teresa-wu.medium.com/media/9d1c79c1ff35b9a1abdfba0adb1caf0a
I have talked about how to train your own model in this post, where results can be personalised, so instead of giving result as a dog, you can customise the result to be “Molly”. Here is a link of some pre-trained models.
Let me know how you liked this TensorFlow Lite tool and your testing results with the model. Full code is available here