This is a short tutorial on how you can convert and train Pifu to convert a 2D photo to a 3D Model with color. Pifu is the predecessor to PIFuHD.
PIFU in theory can be trained to create 3D Models for any type of object, not just humans, but of course, you will need to train it with your own data.
If you are feeling adventurous you can create your own dataset and train PIFu using the Dockerfile that I created for you.
Demo
To try the demo the easiest is to use Google Colab.
Unfortunately, the Google Colab Notebook that you will see in the source code for PIFu doesn’t check which version of Pytorch is installed, so it currently doesn’t work. The pre-trained model available was trained with Pytorch version 1.4, therefore for infering we also need to run Pytorch 1.4
I created a copy of the notebook where I downgrade the version of Pytorch to 1.4. You can ignore the code that creates a video file. That is not really needed. You can just run the notebook and open the mesh with MeshLab.
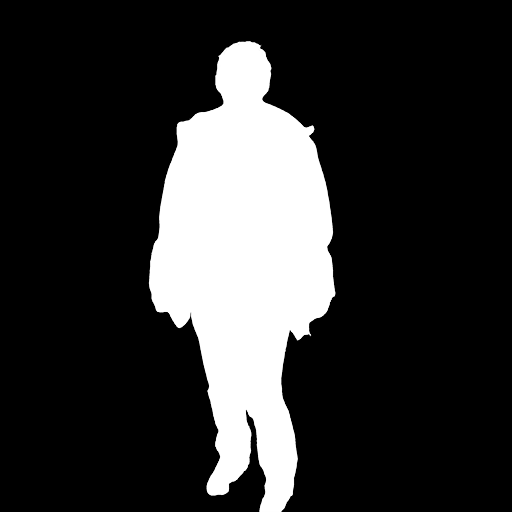
Step 1: Create a photo with the person you want to do the 3D scan. Make sure you create a mask and that both images are 512×512 pixels. In my case I used photoshop.
Step 2: Create a photo with the person you want to do the 3D scan
Step 3: Open Google Colab https://colab.research.google.com/gist/armindocachada/af1b21ef57d8f07516f36c76b20950c7/pifu-demo-with-pytorch-downgraded.ipynb
Step 4: Upload your images under /content/PIFu/sample_images, with the mask, as <image file name>.png and <image file name>_mask.png. Both the image and the mask should be 512×512 pixels.

Step 5: Execute notebook and download generated 3D model from /content/PIFu/results. It will be an obj file.
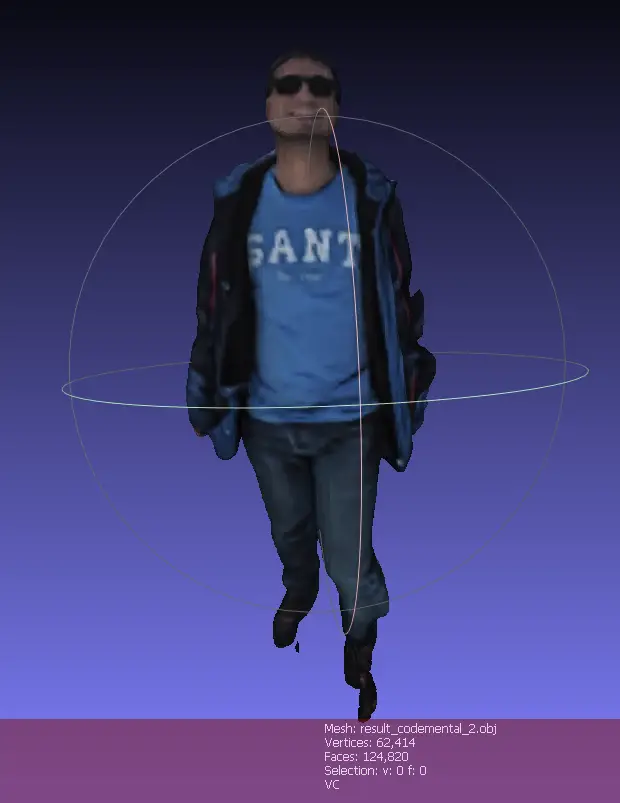
You will need to open the obj file in a Mesh Viewer that supports color per vertex. I suggest downloading Meshlab for quick viewing. Here is my result
Training of Geometry and Color
I was able to perform the data generation steps and execute the training of PIFU on a Windows 10 PC, with WSL Ubuntu 20 with the NVIDA Container Toolkit for allowing Docker access to my RTX 3070 GPU. Installation instructions for the NVIDIA Container tookit can be found here.
If you attempt to follow the manual steps as outlined on the PIFu website, beware. Pyembree is a pain to install on Windows and most likely you will be running the data generation forever because if trimesh is installed without pyembree, it will take forever to do all the Ray tracing calculations on thousands of triangles. Trimesh won’t even warn you that it is not using Pyembree. The only way to find out is by doing:
import pyembree
import trimesh
m = trimesh.creation.icosphere
m = trimesh.creation.icosphere()
# check for `ray_pyembree` instead of `ray_triangle`
m.ray
Out[6]: <trimesh.ray.ray_pyembree.RayMeshIntersector at 0x7f8a8fc6e668>
If you don’t see ray_pyembree in the class package name, then you will be using the fallback calculation for ray tracing. It will take forever.
PREREQUISITES(Windows 10):
- Nvidia GPU
- Nvidia Drivers installed
- WSL Ubuntu 20
- Docker
- Nvidia Container Toolkit
TRAINING STEPS
As explained in the PIFu Github website there are 3 stages for the training:
- Download mesh used for sample dataset
- Data Generation
- Training (Geometry + Color)
The Dockerfile I created already executes the steps for downloading the sample Mesh and the data generation, so you should be able to do the training as soon as you manage to build the docker container.
Assuming that all the pre-requisites have been set up.
Step 1: Download the Dockerfile
FROM mikedh/trimesh:latest
USER root
RUN apt-get update && apt-get install -y zip
RUN apt-get install -y gcc libopenexr-dev zlib1g-dev
USER user
RUN cd /home/user && git clone https://github.com/shunsukesaito/PIFu.git
WORKDIR /home/user/PIFu
RUN curl -O https://renderpeople.com/sample/free/rp_dennis_posed_004_OBJ.zip
RUN mkdir rp_dennis_posed_004_OBJ && unzip rp_dennis_posed_004_OBJ.zip -d rp_dennis_posed_004_OBJ
RUN pip install tqdm
RUN pip3 install opencv-python pyexr pyopengl
RUN python -m apps.prt_util -i ./rp_dennis_posed_004_OBJ
RUN export MESA_GL_VERSION_OVERRIDE=3.3 && python -m apps.render_data -i rp_dennis_posed_004_OBJ -o training -e

FROM nvidia/cuda:11.3.1-base
RUN rm /etc/apt/sources.list.d/nvidia-ml.list && rm /etc/apt/sources.list.d/cuda.list
RUN apt-get update

RUN DEBIAN_FRONTEND=noninteractive TZ=Etc/UTC apt-get -y install tzdata
RUN apt-get -y install python3-pip

RUN pip install torch==1.11.0+cu113 torchvision==0.12.0+cu113 torchaudio==0.11.0 --extra-index-url https://download.pytorch.org/whl/cu113

RUN apt-get install -y python3-opencv
RUN pip install tqdm scikit-image pyembree trimesh

COPY --from=0 /home/user/PIFu /home/user/PIFu
git clone https://gist.github.com/5fcfe5f67d290b817a9c77392b170fa6.gitStep 2: Build the docker container for training
cd 5fcfe5f67d290b817a9c77392b170fa6/
sudo docker build -t pifu/training .
Step 3: Start the docker container
sudo docker run --gpus all -it pifu/training bashStep 4: Run training for Geometry
$ cd /home/user/PIFu
$ python3 -m apps.train_shape --dataroot training/ --random_flip --random_scale --random_trans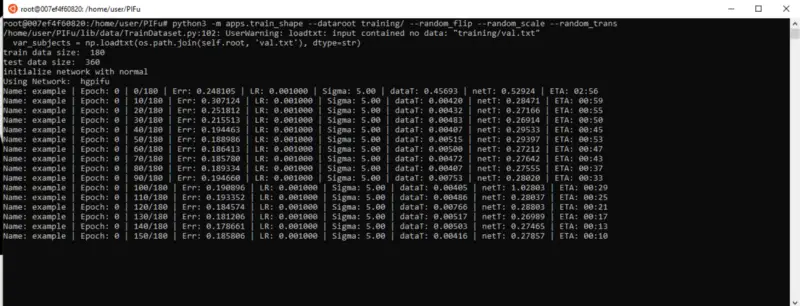
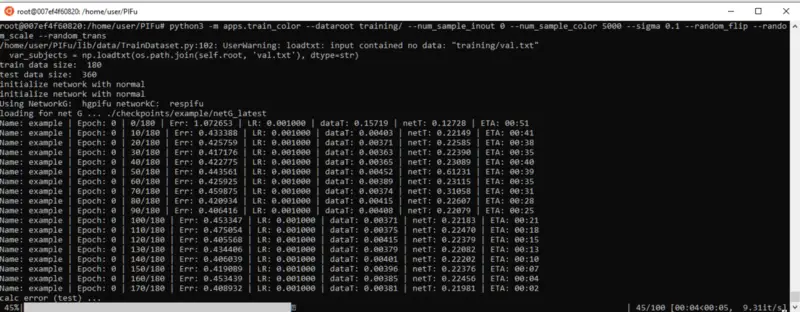
Step 5: Run training for Color
python3 -m apps.train_color --dataroottraining/--num_sample_inout 0 --num_sample_color 5000 --sigma 0.1 --random_flip --random_scale --random_trans
Enjoy!
Sources
Shunsuke Saito, Zeng Huang, Ryota Natsume, Shigeo Mor- ishima, Angjoo Kanazawa, and Hao Li.
PIFu: Pixel-aligned implicit function for high-resolution clothed human digitization.