In this article, I will take you through the steps that are needed to convert any model in Tensorflow Hub to Tensorflow.JS format, and how you can quickly make a simple interactive page that you can host on any web server on the internet. I am only scratching the surface of what is possible. More to come!
What is Tensorflow.js
Tensorflow.js is a client-side framework designed to enable training and inference with a machine-learning directly from the browser, using Javascript.
With Tensorflow.js we can:
- Run pre-trained models, originally developed for Tensorflow directly from the browser. Tensorflow.js provides a command-line tool to convert almost any existing pre-trained model.
- Train new or pre-existing models with Transfer Learning using our own data with a Javascript API.
Tensorflow.js can also run from a Node.js backend, but for this tutorial, I will only focus on running Tensorflow.js directly in the browser.
Why you would want to use Tensorflow.js
One of the reasons I never really wanted to host the ML models I showcased on my Youtube channel, is because it costs too much.
Serving machine learning models as an API from the server-side requires me to pay for computing resources, pay for data transfer costs, memory and file storage. Also if I am allowing anyone to send potentially private data to my server, I need to worry about that as well. The last thing I want to do is to store private data and have to worry about GDPR or any other data protection laws.
By running everything in the client-side, automatically I avoid storing private data by accident.
This is exactly what Tensorflow.js allows you to do.
Trying the Style Transfer Model in Google Colab
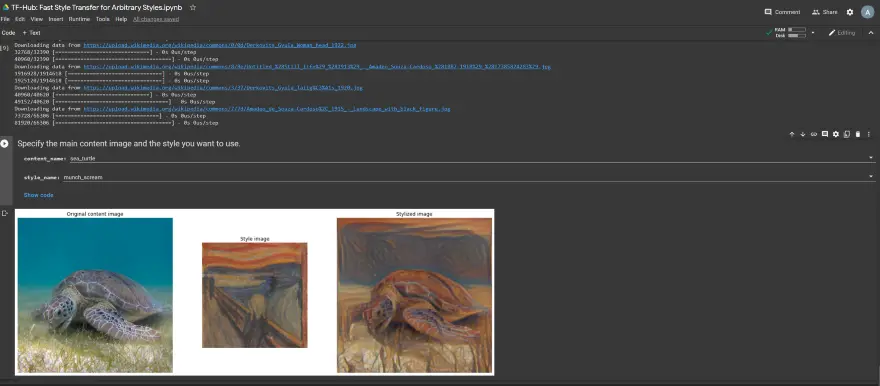
Before we try to run the Style Transfer Model with Tensorflow.js, it is a good idea to first try it in Google Colab.
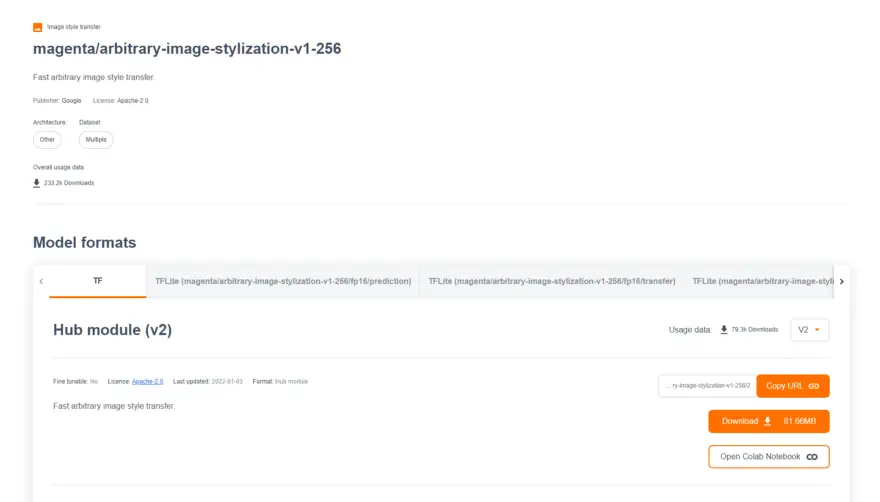
The model is available in the TensorFlow Hub and we just need to click on the “Open Google Colab Notebook” link to view it in Google Colab.
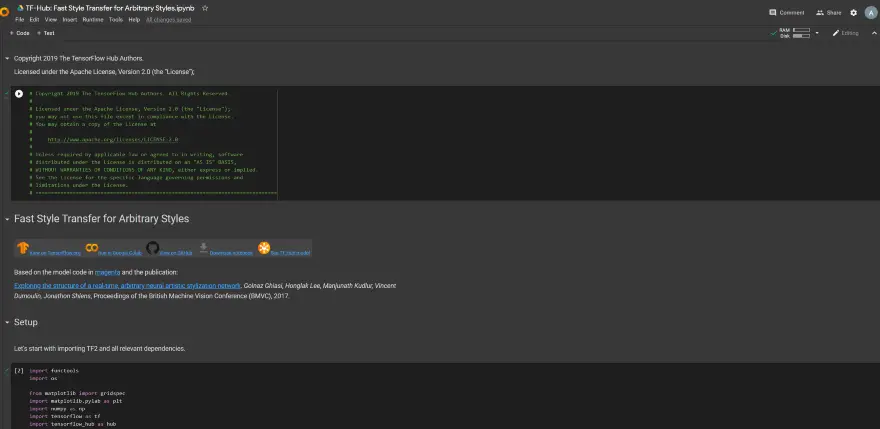
I encourage you to try the notebook. It is also an easy way to get some quick results.
Installing Tensorflow.js
Now that we have tried the Tensorflow model, we need to install the Tensorlow.js pip package. This library will enable us to convert this Tensorflow model to Tensorflow.js web format.
!pip install tensorflowjsThis package provides two things:
- The tensorflowjs_converter command-line tool to convert a model stored in Keras or Tensorflow format to Tensorflow.js
- A Python API to convert a Keras model directly from the python code to Tensorflow.js
We will be using the command line tool tensorflowjs_converter to convert our model, directly from the Tensorflow Hub to Tensorflow.js format.
!mkdir /content/style_transfer
!tensorflowjs_converter --input_format=tf_hub --signature_name=serving_default 'https://tfhub.dev/google/magenta/arbitrary-image-stylization-v1-256/2' /content/style_transfer
Loading the module using TF 2.X interface from /tmp/tfhub_modules/f843094219bf78a99e8ea6c8d71f1bc74f07101a. 2022-01-03 11:07:37.564365: W tensorflow/core/common_runtime/gpu/gpu_bfc_allocator.cc:39] Overriding allow_growth setting because the TF_FORCE_GPU_ALLOW_GROWTH environment variable is set. Original config value was 0. Writing weight file /content/style_transfer2/model.json...We pass the parameter input_format=tf_hub, the signature name that we are looking to use, in this case serving_default. You can think of the signature name as a function name that we will be used for invoking the model.
Serving a Tensorflow.js model
Now that we have converted the Style Transfer model to Tensorflow.js, it’s time to download it and create a simple web page to make use of this model.
It is possible to run Tensorflow.js from a backend using Node.js, but for me, that defeats the purpose of using Tensorflow.js in the first place.
I will be using Tensorflow.js in the browser only.
To use Tensorflow.js from the browser, there are two options:
- Using script tags
- Or, using build tools like Npm, etc.
To keep things as simple as possible I am going to use the script tag approach. If in the future I want to integrate this model into a website using React or even Angular, it might make sense to download all the dependencies via NPM.
Starting a local Web Server
We need to set up a local webserver to serve all the files hosted by the model.
This is because the Javascript Fetch API doesn’t accept fetching files directly from the file system, they need to be downloaded from a URL. This is because of security reasons. If you attempt this you will get an error message in the Javascript console, similar to this:

To make things easy I decided to use docker to run a simple web server on local port 8080 using the following command:
docker run -d -p 8080:80 -v <some-folder-path>/Tensorflow.js:/usr/share/nginx/html/ --name my-nginx-server nginxThis allows me to develop the web page while making changes in real-time.
Importing Tensorflow.js
I create a file called model.html with a script tag include:
<script src="https://cdn.jsdelivr.net/npm/@tensorflow/[email protected]/dist/tf.min.js"></script>I am using v3 of Tensorflow.js. It is really important to use the latest version of Tensorflow.js because some operations in Tensorflow are not fully supported in Tensorflow.js 2.x. For example, in the case of this Style Transfer model, uses the MirrorPad operation which is not yet implemented in Tensorflow.js 2.x.
Verifying that Tensorflow.js works correctly
As a test to check that Tensorflow.js was correctly loaded, place this snippet inside the model.html file inside a script tag:
<script>
// Define a model for linear regression.
 /*const model = tf.sequential();
 model.add(tf.layers.dense({units: 1, inputShape: [1]}));

model.compile({loss: 'meanSquaredError', optimizer: 'sgd'});

// Generate some synthetic data for training.
 const xs = tf.tensor2d([1, 2, 3, 4], [4, 1]);
 const ys = tf.tensor2d([1, 3, 5, 7], [4, 1]);

// Train the model using the data.
 model.fit(xs, ys, {epochs: 10}).then(() => {
   // Use the model to do inference on a data point the model hasn't seen before:
   model.predict(tf.tensor2d([5], [1, 1])).print();
   // Open the browser devtools to see the output
 });
</script>
If all works, you should see some output(not error messages) in the console log.

Preparing the model to be served by Tensorflow.js
Let’s create a folder in the same location as model.html(e.g. style_transfer_tfjs) and place here the Tensorflow.js model files that we generated in Google Colab:
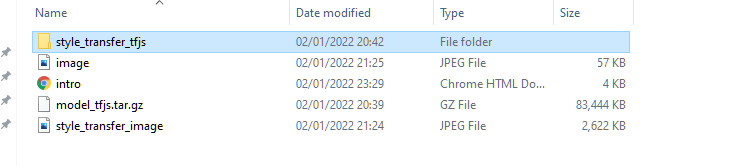
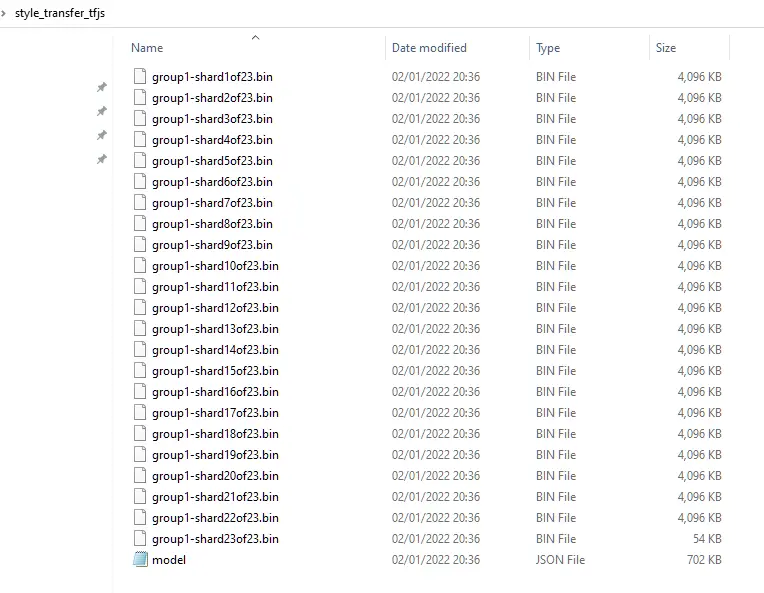
We can also place here an image to stylize (image.jpeg and an image with the style that we want(e.g. style_transfer_image.jpeg).
Loading the Style Transfer model using Tensorflow.js
To load and serve the model we need to use the tf.loadGraphModel() method. This method only works for models saved using TensorFlow SavedModel.
We can place this code inside the script tag for now:
const model = tf.loadGraphModel('/style_transfer_tfjs/model.json');If our model had been created using Tensorflow Keras for example, then another method would need to be used(tf.loadLayersModel()).
When reloading the page we should hopefully not have any errors in the javascript console:
If your Javascript console looks squeaky clean, then that should be a good sign. We are ready to move to the next step.
Loading the images for Style Transfer
In order to test the model, we need images. For now, we will keep things very simple. Using the HTML IMG tag, for now, we are going to hardcode the two images that we are going to use for our Style Transfer:
<html>
 <body>
   <img id="image" src="/image.jpeg" width="500" />
   <img id="styleTransferImg" src="/style_transfer_image.jpeg" width="500"/>
</body>
</html>
With this, we have everything that we need to invoke the style transfer model.
How to Invoke the Style Transfer Model Using Tensorflow.js
To invoke the model we are going to use tf.GraphModel.execute.
The execute method takes as a parameter the inputs to the model and as an optional parameter, the output node name from which to return the result.
Executes inference for the model for given input tensors.
Parameters:
inputs (tf.Tensor|tf.Tensor[]|{[name: string]: tf.Tensor}) tensor, tensor array or tensor map of the inputs for the model, keyed by the input node names.
outputs (string|string[]) output node name from the Tensorflow model, if no outputs are specified, the default outputs of the model would be used. You can inspect intermediate nodes of the model by adding them to the outputs array. Optional
Source: https://js.tensorflow.org/api/latest/#tf.GraphModel.execute
But before we provide the images to the execute method we need to do some preprocessing:
- Convert the image from pixel format to a 3D Tensor using tf.browser.fromPixels
- Normalise the image so that each value in the tensor is between [0,1]. The Tensorflow model likes it that way. Depending on which model you are using, you might also need to resize the images to the required input size.
Luckily for this model, we don’t have to worry about resizing the images. We just need to convert them to a Tensor and normalise them. This is really easy if you copy and paste the required code:
function preprocess(imgData)
{
 return tf.tidy(()=>{
  //convert the image data to a tensor
  let tensor = tf.browser.fromPixels(imgData, numChannels= 3)
  //resize to 256 x 256
  //const resized = tf.image.resizeBilinear(tensor, [256, 256]).toFloat()
  const resized = tensor;
  // Normalize the image
  const offset = tf.scalar(255.0);
  const normalized = imageTensor.div(offset);
  //We add a dimension to get a batch shape
  const batched = normalized.expandDims(0)
  return batched
 })
We need to provide the images as a batched tensor(It needs to be a 4-D Tensor), so that is why we are adding an extra dimension to the normalized image. If you ever need you can apply style transfer to multiple images at the same time!
You might have noticed the commented-out resize code. I left it there on purpose, so that in the future if I need to do some resizing I can just enable the commented-out lines of code. Some models require you to re-size images before sending it to them. Other models are happy to do the hard work for you. The Fast Style Transfer model seems to fit into that category.
Calling the Tensorflow.JS Model using tf.GraphModel.execute
Now that we have defined a preprocess function, we are ready to call the model using model.execute.
As an input we can pass a single Tensor, an array of Tensor or a dictionary with tensors. If you pass a dictionary of tensors then you need to know the name of the input nodes.
A bit too much work, so I am going to pass an array of Tensors and hope they are in the right order.
Now let’s call the model:
let imageTensor = preprocess(image);
let styleImageTensor = preprocess(styleImage)

let result = model.execute([imageTensor, styleImageTensor]);
How to remove extra dimension from 4D Tensor using tf.squeeze()
The output stylised image is returned as a batched 4D tensor. Since we only passed in, one image, the result only has one image. Let’s remove the extra dimension using the tf.squeeze Tensorflow utility function:
tf.squeeze (x, axis?) function
Removes dimensions of size 1 from the shape of a tf.Tensor.
Parameters:
x (tf.Tensor|TypedArray|Array) The input tensor to be squeezed.
axis (number[]) An optional list of numbers. If specified, only squeezes the dimensions listed. The dimension index starts at 0. It is an error to squeeze a dimension that is not 1. Optional
Returns: tf.Tensor
Source: https://js.tensorflow.org/api/latest/#squeeze
let outputImage = tf.squeeze(result);Finally, we need to convert the image from Tensor format to pixel format again. But not only that, we need to draw it somewhere.
Again the Tensorflow.js API comes to the rescue:
tf.browser.toPixels (img, canvas?) function
Draws a tf.Tensor of pixel values to a byte array or optionally a canvas.
When the dtype of the input is ‘float32’, we assume values in the range [0–1]. Otherwise, when input is ‘int32’, we assume values in the range [0–255].
Returns a promise that resolves when the canvas has been drawn to.
Parameters:
img (tf.Tensor2D|tf.Tensor3D|TypedArray|Array) A rank-2 tensor with shape
[height, width], or a rank-3 tensor of shape[height, width, numChannels]. If rank-2, draws grayscale. If rank-3, must have depth of 1, 3 or 4. When depth of 1, draws grayscale. When depth of 3, we draw with the first three components of the depth dimension corresponding to r, g, b and alpha = 1. When depth of 4, all four components of the depth dimension correspond to r, g, b, a.
canvas (HTMLCanvasElement) The canvas to draw to. Optional
Returns: Promise<Uint8ClampedArray>
Source: https://js.tensorflow.org/api/latest/#browser.toPixels
We already have a 3D Tensor, but we are missing the Canvas. The Canvas is an HTML 5 element that allows drawing directly on the browser. The toPixels() needs the Canvas to draw our image. Let’s quickly add one:
<canvas id="stylizedImage" width="500" height="500"/>With the Canvas in place, we can call tf.browser.toPixels()
let outputImage = tf.squeeze(result);
let canvas = document.getElementById("stylizedImage");
tf.browser.toPixels(outputImage, canvas);
And after refreshing the browser, voila:

We get finally a stylized image. But hang on. The result is nothing like what I was expecting after running it in Google Colab. It seems that the model applied the image of the Golden Gate Bridge as a stylized image to the painting of the “Waves of Kanagawa”. It should have been the opposite!?
Luckily it’s a simple fix. We just need to swap the inputs:
let result = model.execute([styleImageTensor, imageTensor]);And we get:
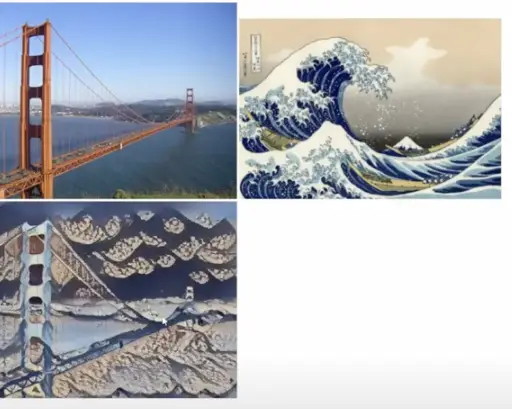
This is more in line with what I was expecting!
The HTML page is pretty basic, for now, but it does the job. I have added some interactivity to the page so that you can pick your own images, and try this model out. I will make it available via this page, once I make it a little bit prettier. It is going to be on Github.
I hope you found this article useful. And see you again soon!
The user interface is very basic, but you can already try out the Fast Style Transfer model from here:
Fast Style Transfer Model Demo
Resources
Recommended Courses for Data Science
- Learn Python for Beginners 👉🏼 Python for Everybody
- Learn Deep Learning with Andrew Ng 👉🏼 Neural Networks and Deep Learning by Andrew Ng
- Learn Data Science with Coursera Plus 👉🏼 Coursera Plus For Data Science
Source Code
https://github.com/armindocachada/fast-style-transfer-tensorflowjs