TensorFlow is a powerful tool, and its image recognition model contains millions of parameters. To train a model from scratch, you will need a lot of data, but if you want to create a project, which recognizes an image with the labeling of “Molly-the dog”, rather than just “a dog”, or “Isabella wedding” rather than “a woman in white dress”, you will need to create and retrain your own model.
Step 1: Install TensorFlow
For this step, please follow Google’s guide. You have options to use Python, Java, Go or C languages on systems on Ubuntu, MacOs and Windows.
Step 2: Prepare your images
Once you have TensorFlow up and running, the next step is to prepare your data. Here is a sample directory of a company employee profile I created myself. Or you can download a prepared set of images from google, by going to your terminal (assuming that you are using a Mac) or other equivalent tool, and entering command:
curl -LO http://download.tensorflow.org/example_images/flower_photos.tgz
tar xzf flower_photos.tgz

Please note, when providing your own images, you need minimum 30 for each class, or you might receive “label x has no images in the category validation” error.
Step 3: Run the script
To build the model, you will need two python scripts: label_image.py and retrain.py, you can download the scripts here, or alternatives you can download the entire project including images from here (note: for private purpose, I didn’t upload personal photos, but the flower photo provided by Google)
Once you have your image set, run the following command to build the model. This process might take around 15–30 mins, depends on your data set sizes.
To run TensorFlow:
source your-tensorflow/bin/activate
To build the model:
python retrain.py --image_dir your-photo-set
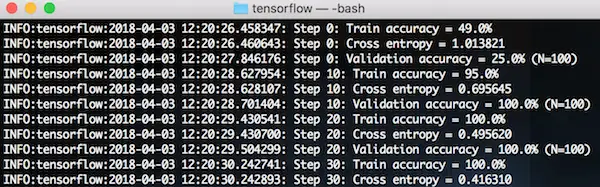
A successfully running script would look like following, where the steps will continue run till it hits your defined number, currently it is 4000 in mine.
Step 4: Time to test your model
python label_image.py --graph=/tmp/output_graph.pb --labels=/tmp/output_labels.txt --input_layer=Mul --output_layer=final_result --input_mean=128 --input_std=128 --image=test.jpg
If everything works fine, you will receive result such as:
Alex 0.90548867
Jane 0.09357964
Will 0.00093174184
To receive most accurate test result for your model, it is recommended to not to use images from your sample folder.
Note: don’t forget to terminate TensorFlow with command:
(tensor)your-name$ deactivate
If you are interested to run TensorFlow on mobile, click here for tutorial on TensorFlow Lite — Android.