This a short guide detailing the steps I had to complete to enable Resizable BAR Support for an Asus ROG Strix 570-E motherboard, a Ryzen 5000 series CPU, and a Gigabyte Nvidia RTX 3070 graphics card.
Before Starting
Before starting, we should first check our system fulfils the pre-requisites to enable Resizable BAR:
- Do you own an Nvidia RTX 30 series card?
Yes. - Is your CPU in the list of supported CPUs as specified by NVIDIA in their website?
I own a Ryzen 5000 series CPU, so I am good to go.
Oddly enough AMD Ryzen 3000 series are not in the list of supported CPUs. It is strange because AMD does support the Smart Memory Access Feature for Ryzen 3000 series. If you know that the Ryzen 3000 series is also supported, please let me know. I am sure in the near future, it will be added anyway - Does your motherboard provide support for Resizable BAR?
I own an Asus ROG Strix 570-e motherboard so I am good.
Installing the latest Nvidia Game-Ready Driver
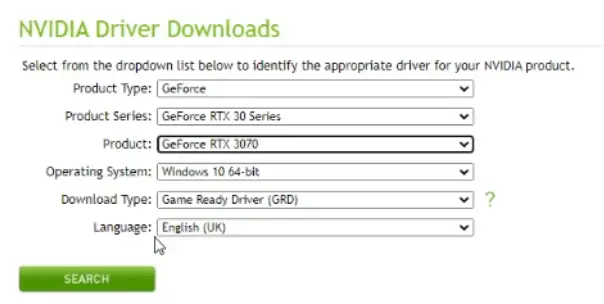
Before updating the BIOS in the Motherboard and the GPU VBIOS, lets first install the latest Nvidia Game-ready driver with Resizable BAR support.
In my case the latest Nvidia Game-Ready driver is Version 465.89
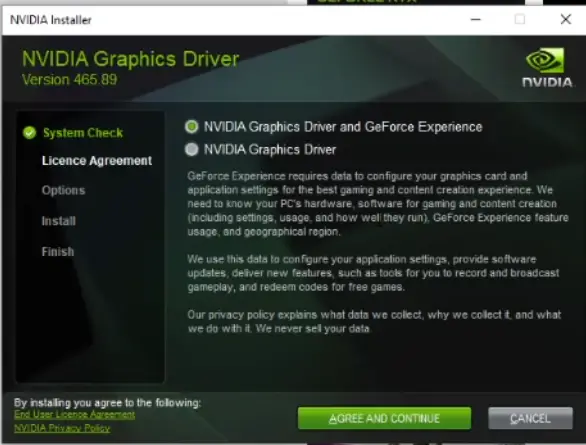
After installing and restarting my PC I now see in the Nvidia Control Panel that the latest driver is up to date:

We are ready to upgrade the BIOS in the motherboard.
Updating an Asus Motherboard BIOS using USB-Flashback
If my Asus motherboard didn’t have BIOS USB-flashback, I would be sweating at this step. And for a good reason, if you get this wrong, you can brick your motherboard for good. So be careful.
Download most recent BIOS drivers from ASUS website
First thing I do, is to head to the Asus ROG Strix 570-E motherboard’s product page in the Asus.com website:
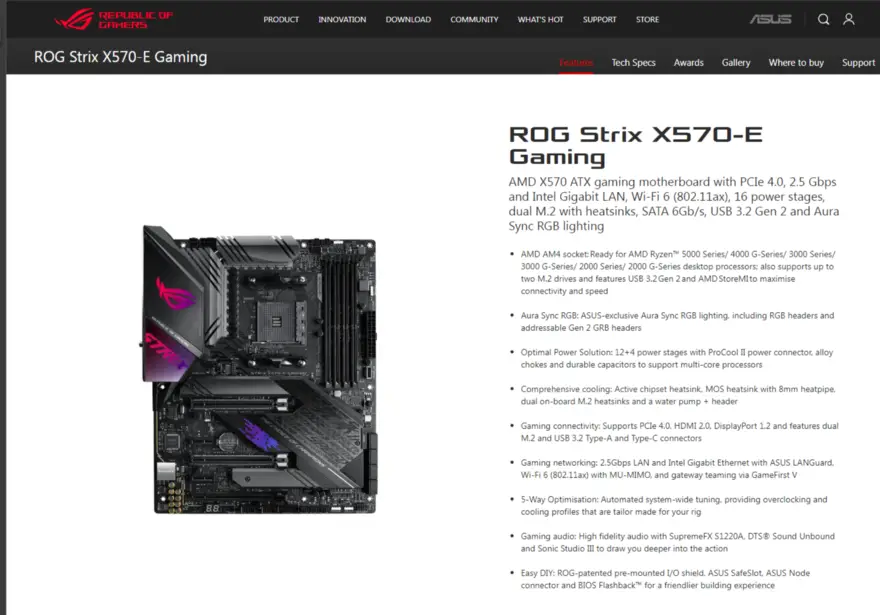
From there it is possible to access the support page, from where we can download the latest BIOS update.
Click Support and then Drivers & Tools.
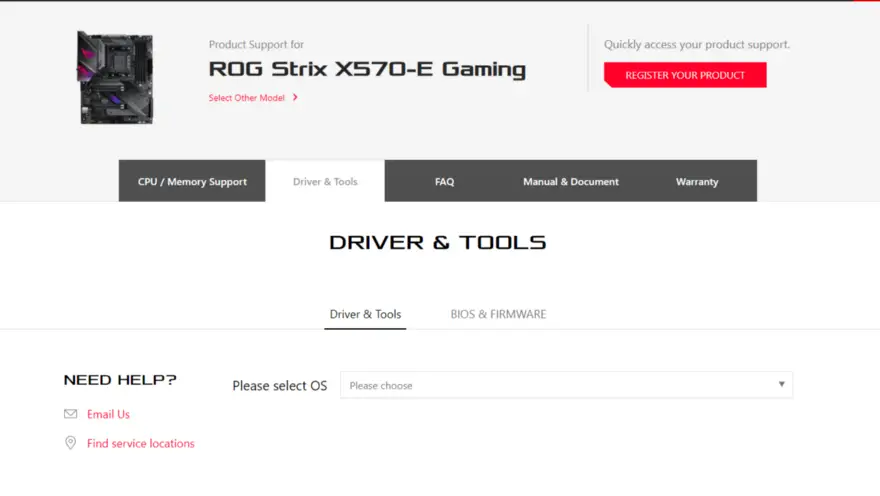
Select Windows 10 64-bit from the dropdown and then from there we are able to download the latest BIOS update.
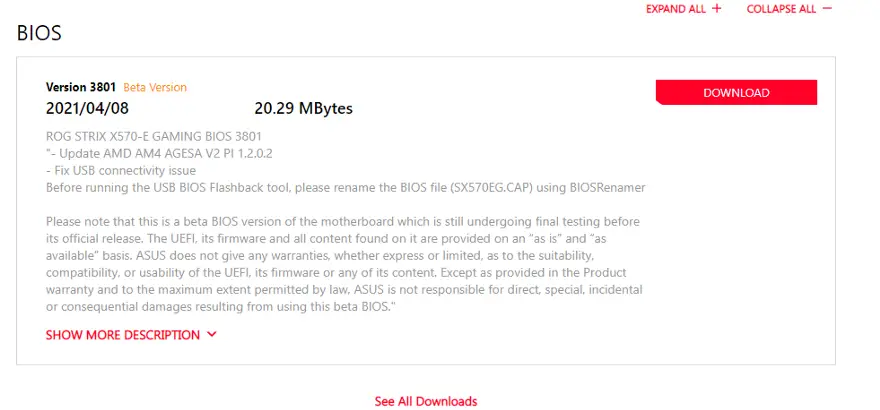
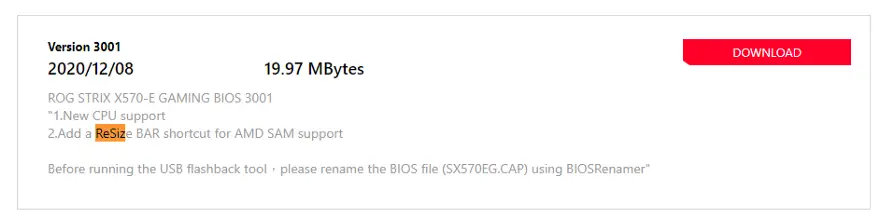
I downloaded the BETA driver, released on the 8th of April 2021. Note that you don’t necessarily need to download the BETA driver as support for Resizable BAR has been added since version 3001, which was released back in December when AMD released their own Smart Access Memory feature.
The wisest thing to do, should be to download the latest non-beta driver. But then why does ASUS not show that by default. Maybe they are looking for beta-testers?
Copy the latest BIOS update to a Flash Drive
Download the latest BIOS from the Asus website.

First, connect a USB flash drive formatted as FAT32 to any USB ports in the computer. At this stage, you should not use yet the BIOS USB Flashback port.
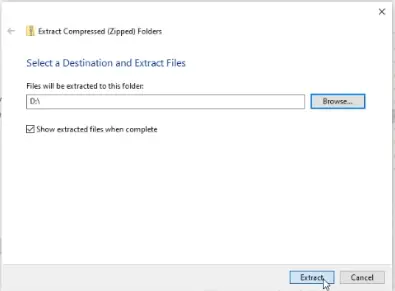
Extract the zip file directly to the root of the USB flash drive:
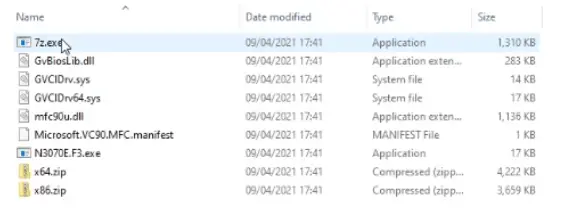
After extracting, I saw two files in the root folder of my USB drive:
- ROG-STRIX-X70-E-GAMING-ASUS-3801.CAP — the bios update
- BIOSRenamer.exe — the executable that we need to call to rename the BIOS update ready for our motherboard to ingest

Now to make the BIOS update ready I just had to double click on BIOSRenamer.exe:
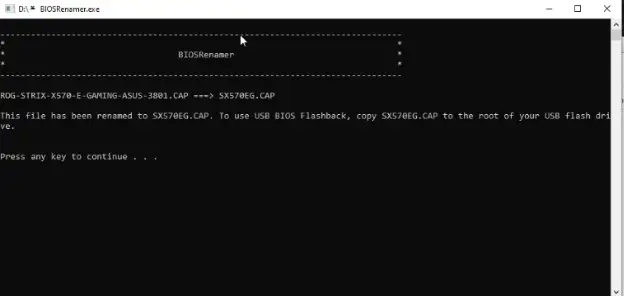
This renamed the .CAP file to SX570EG.CAP

So now it is time for the scary part.
Update the BIOS using USB BIOS Flashback
You need to shutdown the computer, and place the USB flash drive into the USB FlashBack port, which is in the back of the computer.
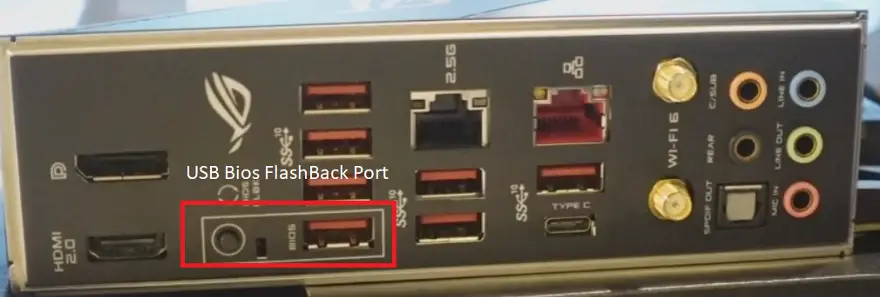
Do NOT turn ON the computer with the normal power button.
Instead press the BIOS Flashback button, for around 3 seconds until the LED starts blinking.
Once you see the LED blinking, don’t touch it anymore! It can take several minutes for the update to finish, and you definitely don’t want to try and power on your computer, before it has a chance to complete.
Good recommendation is while the BIOS is updating, have a coffee or something and by the time you are back it should be all done.
How to verify that the BIOS update has completed
It is easy to know when the BIOS update is completed because the LED light in the motherboard will stop blinking.
Booting the Computer for the first time after BIOS update
Once you boot up the computer the first time after the BIOS update you will see a message on the screen showing that the BIOS is updating. Do not power off. It is just one more step that the BIOS needs to do before it is fully updated.
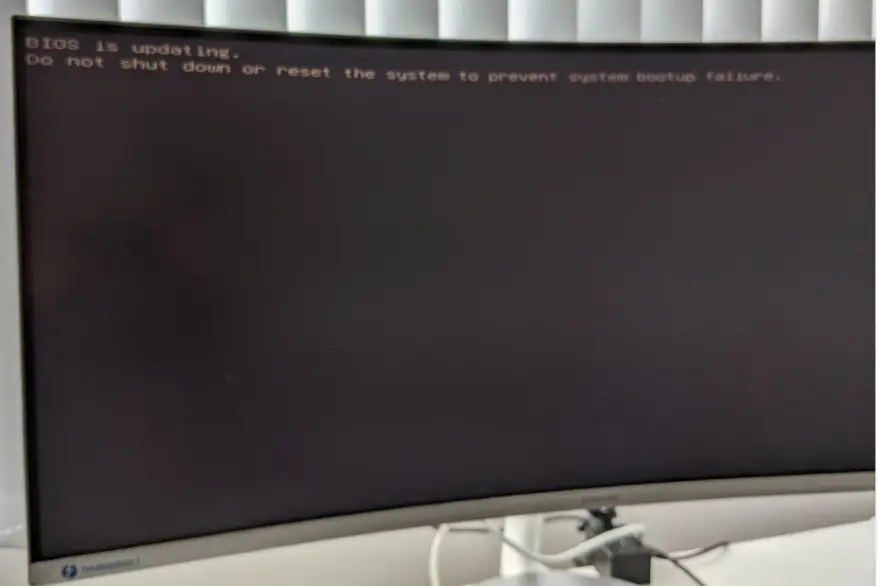
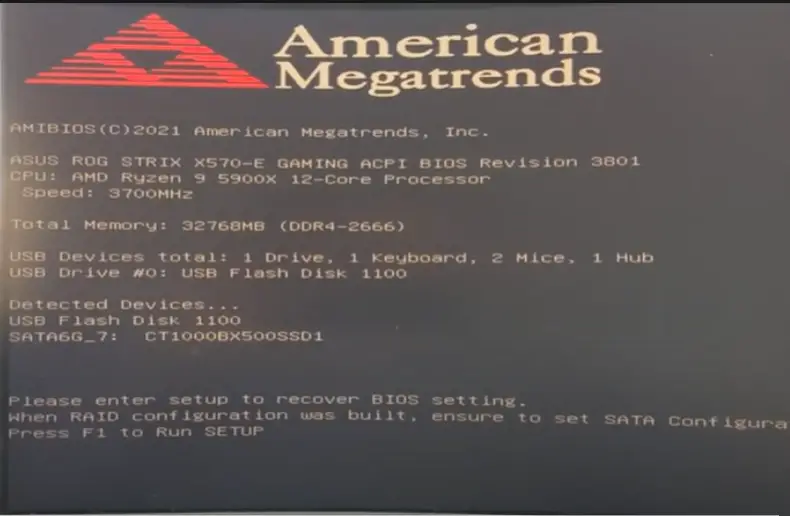
After the BIOS update is completed you will be prompted to press F1 to enter the BIOS setup.
Enabling Resizable BAR in the BIOS screen
Now that my BIOS update is fully completed, it is time to enable Resizable BAR.
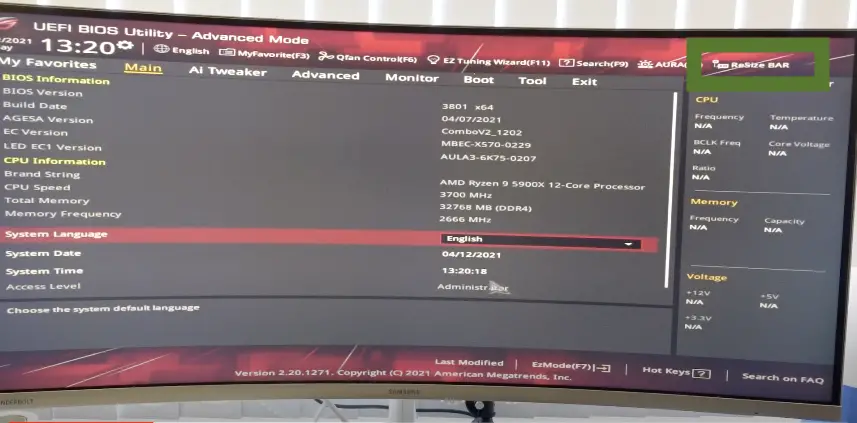
At the top right of the BIOS screen, you should see the ReSize BAR menu item. Double click on it, and you should see dropdown with an ON and OFF option:
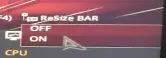
Double-Click on ON. This should be enough to enable Resizable BAR.
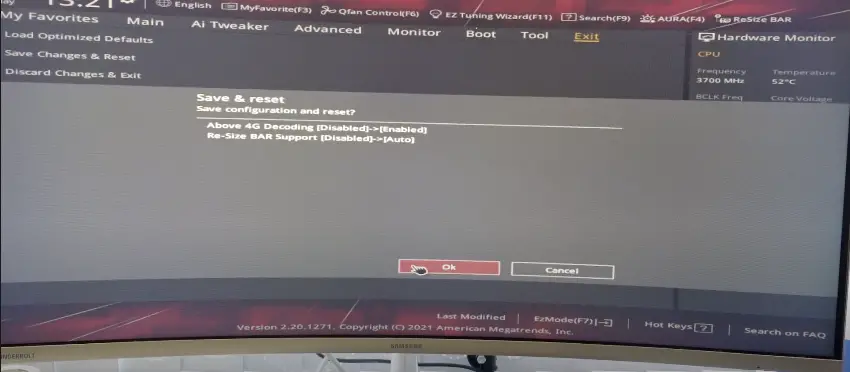
Don’t exit the BIOS setup yet. Go to Advanced-PCI Subsystem Settings
Enable “Above 4G Decoding” if not enabled.

You should see the option “Re-Size BAR Support” appear below. If its disabled, change it to Auto.
Now double-click Exit in the top menu and select the option “Save Changes & Reset”
And that is it, we have enabled Resizable BAR Support in the motherboard.
Updating VBIOS in Gigabyte Nvidia RTX 3070 Graphics card
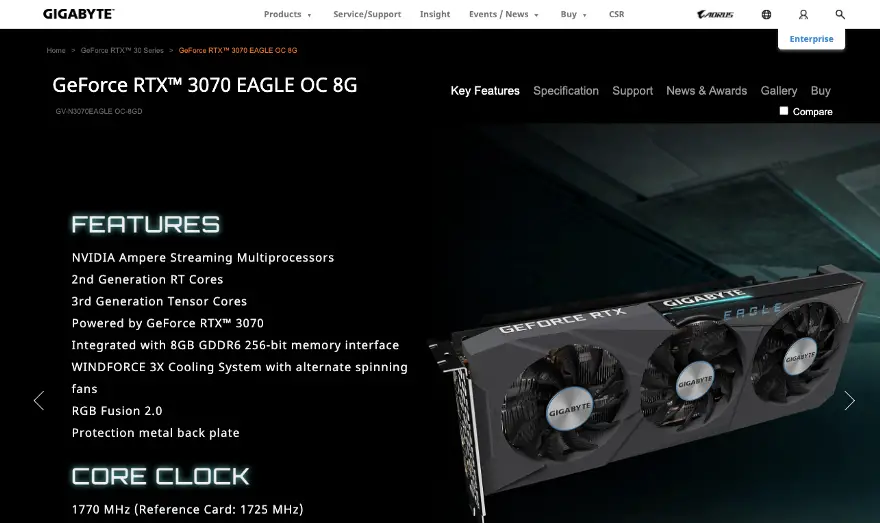
Now it is time to update the VBIOS of my Gigabyte RTX 3070 EAGLE graphics card with a new VBIOS which allows me to enable Resizable BAR Support.
First lets go to the support page of the graphics card.
Then click Support
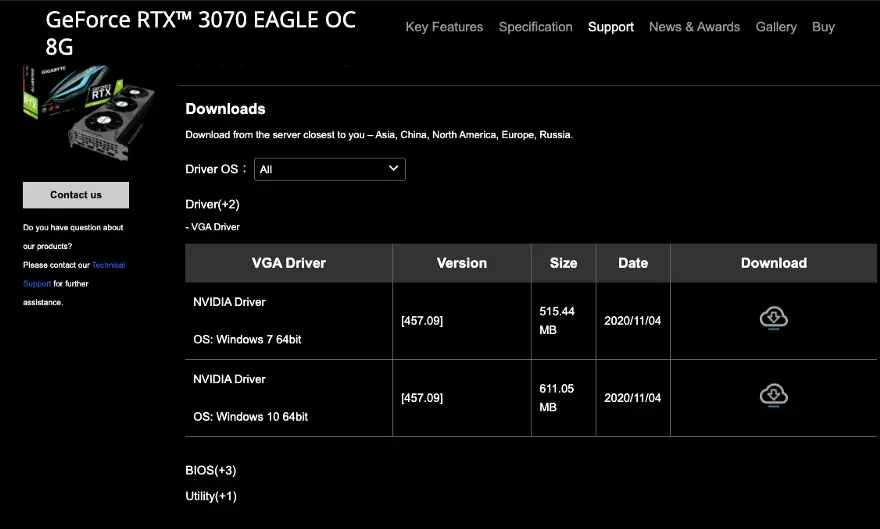
Expand the BIOS(+3) section
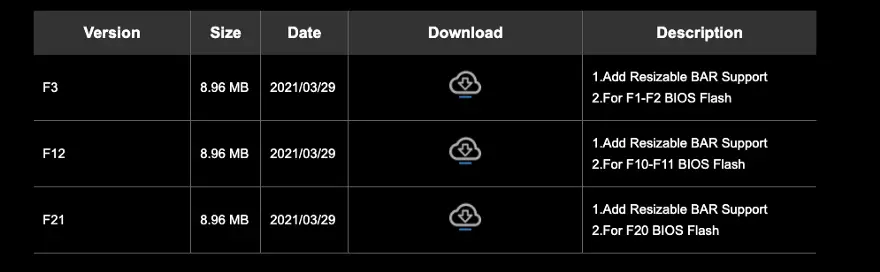
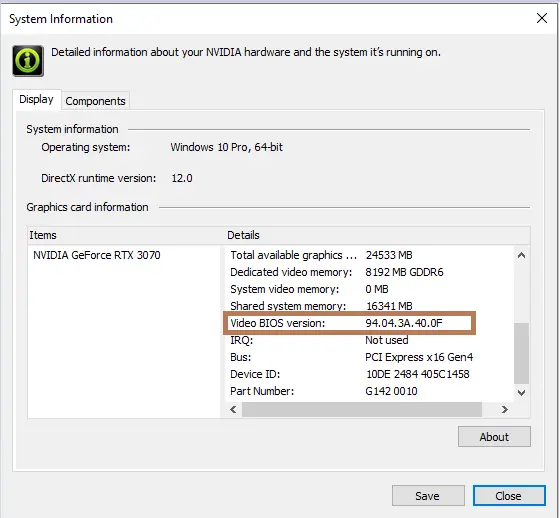
There are three versions of the BIOS to update(F3, F12 and F21), and we need to know which BIOS version we currently have(F1,F2, etc). Unfortunately, the Nvidia Control Panel in this case is not really helpful.
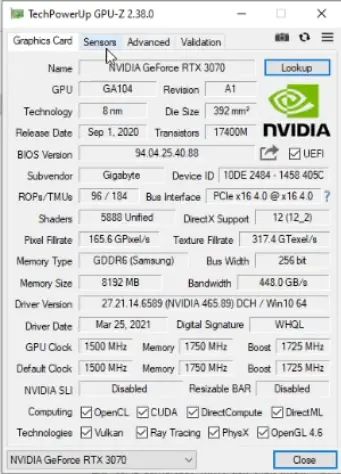
More helpful is the GPU-Z utility, which tells us exactly which Video BIOS version we currently have.
Download and run the GPU-Z utility directly. You don’t really need to install it.
Then click Advanced and from the dropdown select Nvidia BIOS

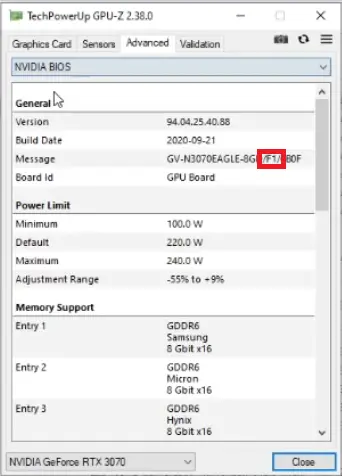
In the message field we can see which version of the VBIOS we are running. In my case, I am running the F1 version. This means I need to download the F3 BIOS update!
Let’s do that!
Downloading and Installing the VBIOS update
Once you download the correct VBIOS update, extract the zip file to a folder in the computer.
Inside you will find another zip file named x64.zip
Extract this zip file to a subfolder. The zip file is password protected. The password is buildforge
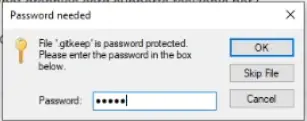
Once you have done that, go inside the x64 folder. And it is time to update our BIOS

Double click the executable. You will get a popup from Windows Defender.
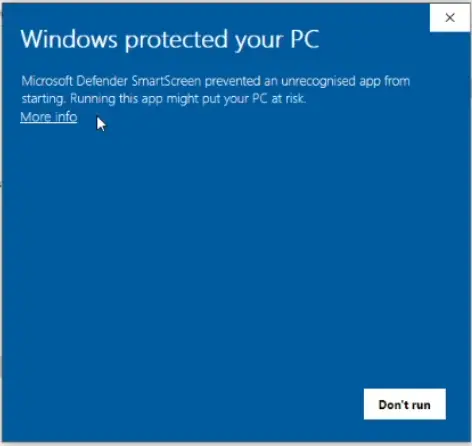
Click More info
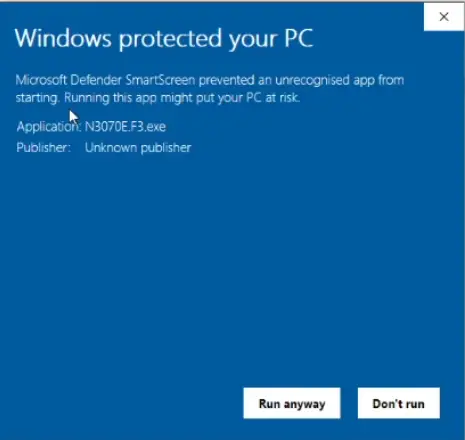
I have downloaded my BIOS update from the official Gigabyte website, so I trust it. So in my case I clicked Run anyway. In your case, just be sure where you download your BIOS from.
After installation of the VBIOS succeeds, the computer should restart normally. And if we are lucky, we should already have Resizable BAR enabled!
Let’s do the final verifications.
Verifying that the VBIOS is updated and that Resizable BAR is enabled
First thing we need to do, is to check that the VBIOS is updated to the new version. Lets use the GPU-Z tool again:
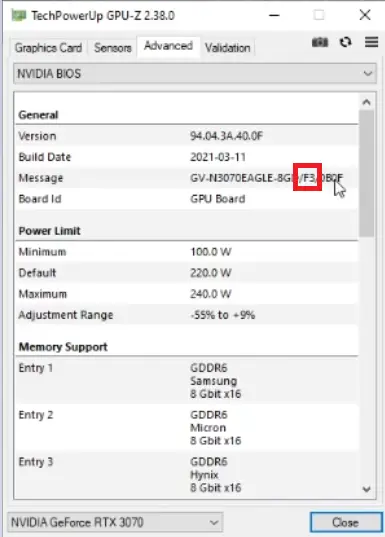
As you can see my VBIOS is now updated from version F1 to version F3.
Now, the moment of truth. Is Resizable BAR enabled? We can check that in the NVIDIA Control Panel:
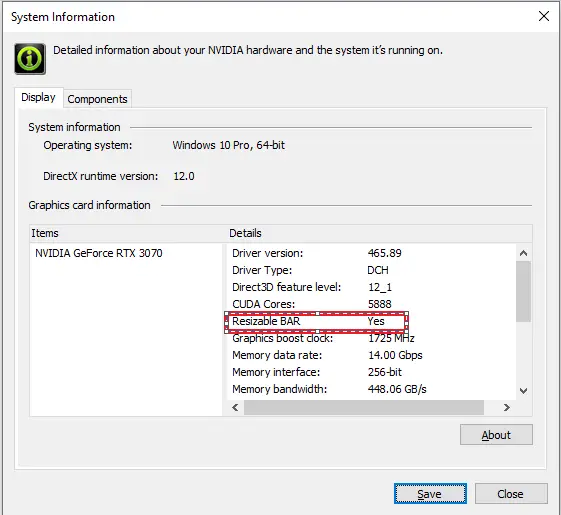
And that is it! Resizable BAR is now enabled.
Happy Gaming!
RESOURCES
GeForce RTX 30 Series Performance Accelerates With Resizable BAR Support