This is a very practical tutorial. I am not going to dwell on why microservices are here to stay and why Kubernetes is a beast to set up. I am going to cut it straight to the core. You have come here for a solution to your problem, and I am going to give you one.
You are probably reading this article because your organisation is using or decided to use Kubernetes.
But you or your development team is complaining because it is hard to develop locally without wasting time with deployments(docker build, docker push, kubectl rollout, etc). What is meant to be a one-liner code change, takes several minutes to test??? That is not acceptable.
Thankfully there is a fix that will be like heaven on hell, for any developer looking to develop fast.
I introduce to you…. Minikube and Skaffold.
For this tutorial, you will be downloading a GitHub repository that I have created:
https://github.com/armindocachada/strapi-kubernetes-skaffold-example
In this repository, you will find a CMS component that uses Strapi and a front end written in NodeJS. Before you get too excited about the front end… don’t.
It’s just a few lines of javascript code that retrieves data from a Strapi backend using a REST API, to prove that we are able to connect and retrieve data.
What you should be excited about, is that you should be able to start developing on Kubernetes after a few seconds by just executing a skaffold command. Of course, I am assuming you’ve already installed Minikube, Skaffold and Kustomize.
Let’s get started.
Step 1: Install Docker
Use this link for detailed instructions on how to install docker:
Step 2: Install Minikube
Use this link for detailed instructions: https://kubernetes.io/docs/tasks/tools/install-minikube/
If you are on a MacOS you will want to start Minikube in the following way:
$ minikube start --driver hyperkit --mount --mount-string /Users:/Users
By default Minikube only allocates 1GB of memory for its VM. You will need to give it more memory and possibly more CPUs. Otherwise, you will see memory errors when skaffold tries to redeploy certain containers.
Example of starting Minikube with 8GB of memory and 4 cpus:
minikube start --driver hyperkit --mount --mount-string /Users:/Users --cpus 4 --memory 8192
The reason for this customised start script is so that we have a way to share files between our host and the Minikube VM. This could be useful for instance if you have a database backup with which you want to initialise Mysql. Or if you want to build a docker image directly on the docker registry in Minikube.
If you are trying to build a docker container directly from the command line then you will also want to run:
eval $(docker-machine env -u)
But because we are using Skaffold to do the heavy lifting for us, this will not be necessary for us.
Step 3: Install Skaffold
To install Skaffold, follow these instructions: https://skaffold.dev/docs/install/
Step 4: Install standalone Kustomize
Minikube ships with Kustomize, which is integrated into the kubectl command.
Unfortunately, Skaffold only works with the standalone version of Kustomize. So you will need to download and install Kustomize.
Update: New versions of Skaffold now have kustomize built-in. No need to download the standalone Kustomize anymore
https://kubernetes-sigs.github.io/kustomize/installation/
Step 5: Download the example strapi project
git clone https://github.com/armindocachada/strapi-kubernetes-skaffold-example
Step 6: Modify overlays/dev/mysqlbackup-volumes.yml
apiVersion: v1
kind: PersistentVolume
metadata:
  name: mysql-backups-volume
  labels:
    type: local
spec:
  storageClassName: mysql-backups-sc
  capacity:
    storage: 1Gi
  accessModes:
    - ReadWriteMany
  hostPath:
    path: "/Users/<YOUR USERNAME>/projects/strapi-kubernetes-skaffold-example/cms/db"
---
apiVersion: v1
kind: PersistentVolumeClaim
metadata:
  name: pvc-sc-mysqlbackups
spec:
  storageClassName: mysql-backups-sc
  accessModes:
    - ReadWriteMany
  resources:
    requests:
      storage: 1Gi
Provide a full path to the db folder, which contains the DB dump.
Step 7: Modify overlays/dev/strapi.yml
---
apiVersion: v1
kind: PersistentVolume
metadata:
  name: strapi-volume
  labels:
    type: local
spec:
  storageClassName: strapi-sc
  capacity:
    storage: 10Gi
  accessModes:
    - ReadWriteMany
  hostPath:
    path: "/Users/<your username>/projects/strapi-kubernetes-skaffold-example/cms/persistent"
---
apiVersion: v1
kind: PersistentVolumeClaim
metadata:
  name: pvc-sc-strapi
spec:
  storageClassName: strapi-sc
  accessModes:
    - ReadWriteMany
  resources:
    requests:
      storage: 10Gi
Provide a full path to the cms/persistent folder, which contains a copy of an example strapi schema.
Do you have a suggestion on how to make this better? I would love to hear your feedback.
Step 8: Start Skaffold
$ cd strapi-kubernetes-skaffold-example
$ skaffold dev
Listing files to watch...
- example/strapi
Generating tags...
- example/strapi -> example/strapi:12ca63
Checking cache...
- example/strapi: Not found. Building
Found [minikube] context, using local docker daemon.
Building [example/strapi]...
Sending build context to Docker daemon    450kB
Step 1/9 : FROM strapi/strapi
---> dbaecb7cc54f
Step 2/9 : RUN mkdir /app
---> Using cache
---> 1e7cfae17eda
Step 3/9 : WORKDIR /app
---> Using cache
---> 69535ccbc52c
Step 4/9 : COPY ./cms/package.json .
---> Using cache
---> 3c8f79bd78fc
Step 5/9 : RUN yarn install
---> Using cache
---> e9aef355b99b
Step 6/9 : COPY ./cms .
---> 156f41f3ae4b
Step 7/9 : RUN strapi build
---> Running in 1b7bc12bbfff
Building your admin UI with development configuration ...
ℹ Compiling Webpack
✔ Webpack: Compiled successfully in 56.36s
---> 2fcb77c30ee1
Step 8/9 : CMD ["strapi", "start"]
...[cms] ┌─────────────────────────────┐
[cms] │ http://localhost:1337/admin │
[cms] [2020-09-11T10:49:24.766Z] debug GET
/admin/33d5f0d956f3fc30bc51f81047a2c47d.woff2 (1 ms) 200
Note that Skaffold will continue running until you do Ctrl-C to terminate. At that point, it cleans up any pods, volumes or any resources that were created to deploy the app to Minikube.
You will see some Mysql connection errors at the start of skaffold. This is because the MySQL pod takes a bit longer to be available then the CMS strapi component. The CMS pod tries to connect to the MySQL database and since it is unable to, it crashes. Kubernetes is smart enough to restart the pod. Eventually, the errors will disappear and all the pods will be in the running state.
In a production environment, this crash behaviour is not ideal as it generates large amounts of unsightly errors. But hey, we are not looking to use this for production!
Step 9: Retrieve the URL for the CMS and the Front end
If all goes well, you will have 3 pods running, and 3 persistence volumes.
$ kubectl get podsNAME                         READY   STATUS    RESTARTS   AGEcms-7f69cb495b-4j5zd         1/1     Running   2          22m
cms-mysql-769ddb9469-n6jsc   1/1     Running   0          22m
front-end-769ddb9469-n6jsc   1/1     Running   0          22m$ kubectl get pvNAME                                       CAPACITY   ACCESS MODES   RECLAIM POLICY   STATUS   CLAIM                    STORAGECLASS   REASON   AGE
pvc-293db68b-ef2b-464a-a32d-15aaaee14d0e   1Gi        RWO            Delete           Bound    default/pvc-sc-strapi    standard                24m
pvc-5c26a70b-dc5d-4432-b9dc-7ede3eed7e6b   1Gi        RWO            Delete           Bound    default/mysql-pv-claim   standard                24m
To access the CMS and the front end you will need to call:
$ minikube service cms --url
http://192.168.64.2:30391$ minikube service front-end --url
http://192.168.64.2:303222
The URLs above are unique to your environment.
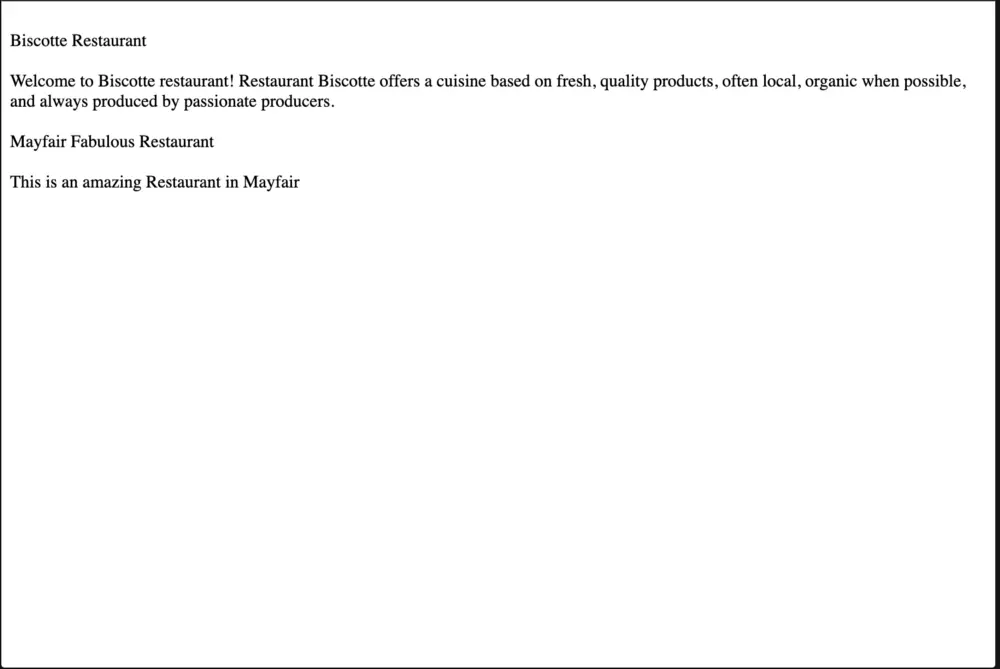
You are ready to develop now. Access the front end URL and you should be able to see the following screen:

It is not an amazing front end but you could improve it. For example, you could a title to the page in server.js.
You will notice that once you change the file, it will be automatically copied to the pod and Nodejs will restart automatically(using nodemon). This, without having to rebuild a new docker image.
So literally you can develop and see your changes instantaneously appear. This can save months of development potentially.
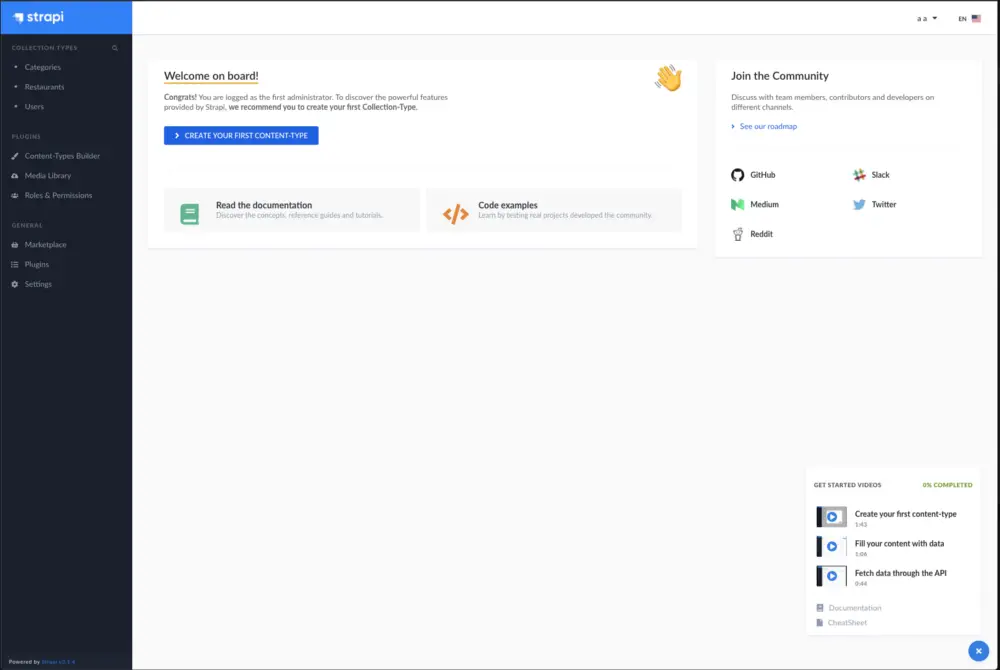
Let us access the Strapi CMS and add an extra restaurant.
The username and password you will need to use are:
username: [email protected]
password: aZrnkuyQRbt9zgP
This is a generated password and doesn’t match any of my existing passwords. Just saying it… I trust you all 😉

Click on Restaurants at the top left.

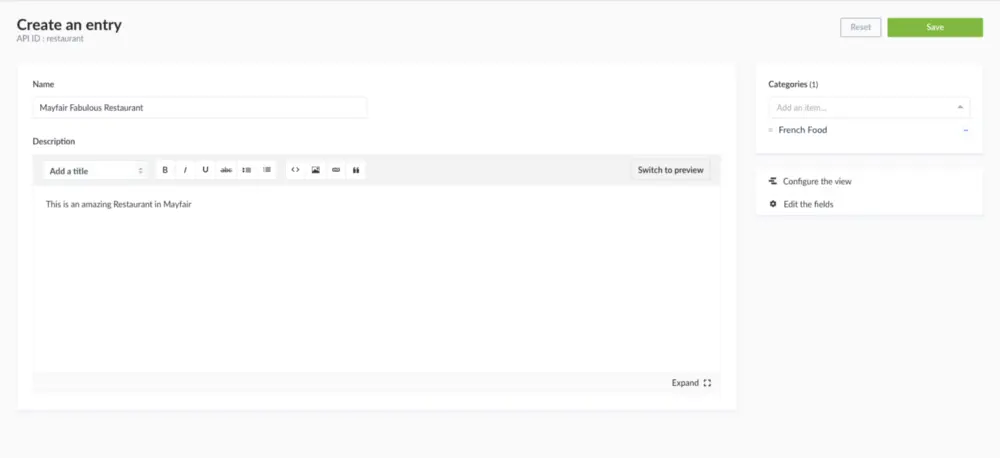
Add a new Restaurant, and assign it to an existing category. You can be as creative as you wish with your restaurant and description.
You should have now two restaurants:

Lets now refresh the front end.

You can see now that there are two restaurants being displayed in our rough front end.
How it was all put together
The github repository, which by now, I hope, is bookmarked, has some important configuration files:
skaffold.yaml
This file configures Skaffold so that it understands how to build our Strapi application. Here I tell it where it can find the Dockerfiles and where to look for environment configuration.
Note the sync section on each docker image section. This sync section does all the magic that we need to copy our changes to the docker containers without having to rebuild and redeploy a docker image. That would take too much precious time as redeploying even a simple container takes at least a couple of minutes.
base/kustomize.yaml
In the base folder, you will find the kubernetes deployment templates for our application. These deployment templates are the starting point for deployments in all environments. The kustomize.yaml allows us to bundle up all the deployment yaml files together as a bundle and deploy it as a unit to kubernetes.
Each environment can have a separate folder inside overlay and that allows us to make specific changes for the Strapi application to run in specific types of environments. For example, in a local development environment, we need to use HostPath volumes to share files from our local file system with the pods. We only want this to apply to the local development environment and nowhere else.
overlays/dev/kustomization.yaml
apiVersion: kustomize.config.k8s.io/v1beta1
kind: Kustomization
patches:
- patch.ymlresources:
- ../../base
- strapi-volumes.yml
- mysqlbackups-volumes.yml
You can see that in the dev environment we include all the configuration from the base templates and we add extra templates, for Mysql and Strapi itself to have some initial data. This is key for a developer to be quickly up and running with a local Kubernetes environment.
There is probably a lot more to be said about the code in the Git repository. But then I think it is better to let the source code to do all the talking!
If you have any questions I will try to resolve any queries!
Resources:
https://github.com/armindocachada/strapi-kubernetes-skaffold-example
https://strapi.io/blog/deploy-strapi-on-kubernetes-with-https